GeezerVisonThe World Wide Web, restored to 800 pixels of glory. |
| Home|About|Gaming cabinet|Archives|How it works|Starter sites |
GeezerVison is showing computingforgeeks.com — Install Qdrant on Ubuntu 26.04 / 24.04 / 22.04 | ComputingForGeeks Qdrant is the open source vector database that powers retrieval at scale for AI applications. This guide walks through installing Qdrant on Ubuntu LTS, covering both the Docker path most teams use and the native .deb path when you need a system service without Docker. The same steps apply to Ubuntu 26.04, 24.04, and 22.04, with version-aware commands for each. Original content from computingforgeeks.com - post 167996By the end you will have Qdrant running, the REST API responding, the built in Web UI loaded in a browser, and a first collection holding a few vectors so you can confirm search works. We tested every command in this guide on a fresh Ubuntu 24.04 LTS VM. Companion code lives at c4geeks/qdrant/install-ubuntu, and the canonical reference for any flag in this article is the official Qdrant documentation. If you are new to vector databases as a category, our vector search vs traditional search explainer walks through why dense retrieval beats keyword matching for fuzzy intent queries. If you are weighing Qdrant against a Postgres extension, the install pgvector on PostgreSQL walkthrough sets up the other end of the self host spectrum. Before you beginYou will need the following:
Refresh the package index so the rest of the steps run cleanly: Method 1: Install Qdrant with DockerDocker is the recommended install path for almost every Qdrant deployment. The image is the same one the maintainers ship to production, so what runs on your laptop is what runs in the cluster. Step 1: Install the Docker engineAdd the Docker apt repository and install the engine plus the Compose plugin: Add your user to the Step 2: Detect the latest Qdrant release and pull the imagePull a specific Qdrant tag so your environment is reproducible. Capture the latest release tag into a shell variable, then use it everywhere: Step 3: Run Qdrant with persistent storageCreate a host directory for the vector data, bind it into the container at the canonical Confirm the container is running and the ports are bound: The output should show the container in the 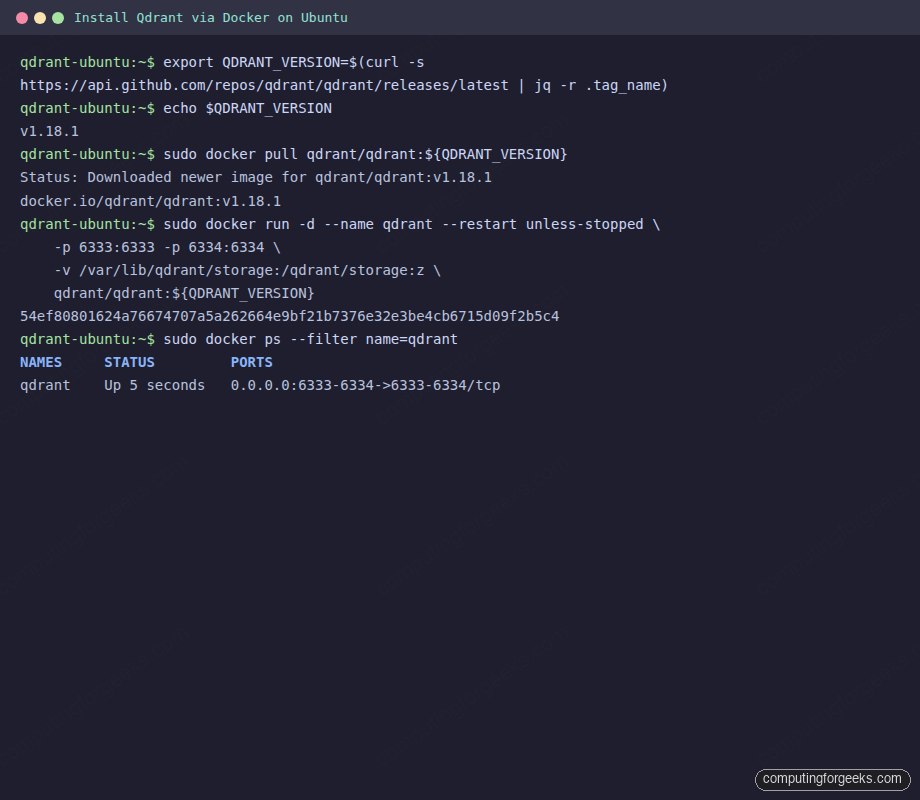 Step 4: Verify the installQdrant exposes three quick endpoints to confirm the service is alive, ready to serve queries, and on the expected version: You should see the health probe pass, the version response confirm the running tag, and readiness report that the shards are loaded:  Step 5: Create your first collection and searchA collection holds points (your vectors plus their metadata). Create one called Now run a similarity search. The vector closest to the query gets the highest score: Berlin lands first, Nairobi second, Tokyo last because its vector points the other way. This is your end to end sanity check that ingest, index, and query all work: 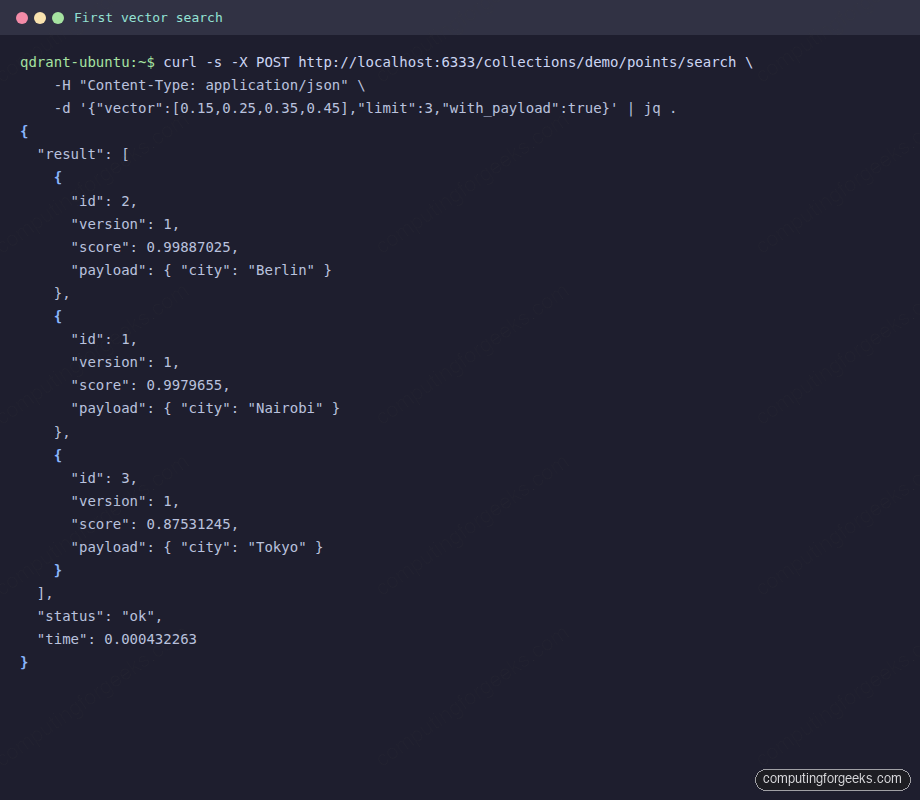 Step 6: Open the built in Web UIEvery Qdrant container ships with a browser based UI at 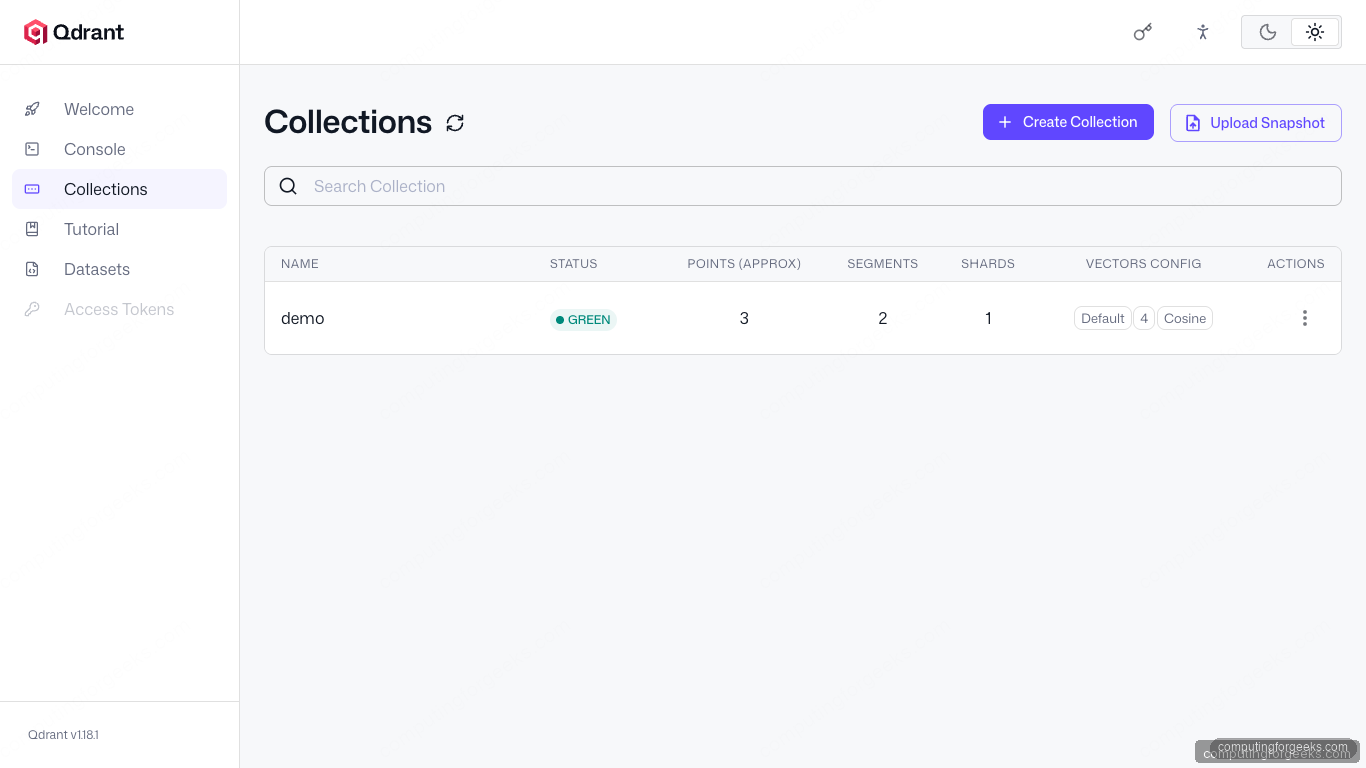 Click Console in the sidebar to run REST calls directly from the browser. Useful for quick experiments and onboarding teammates who do not have curl in their muscle memory: 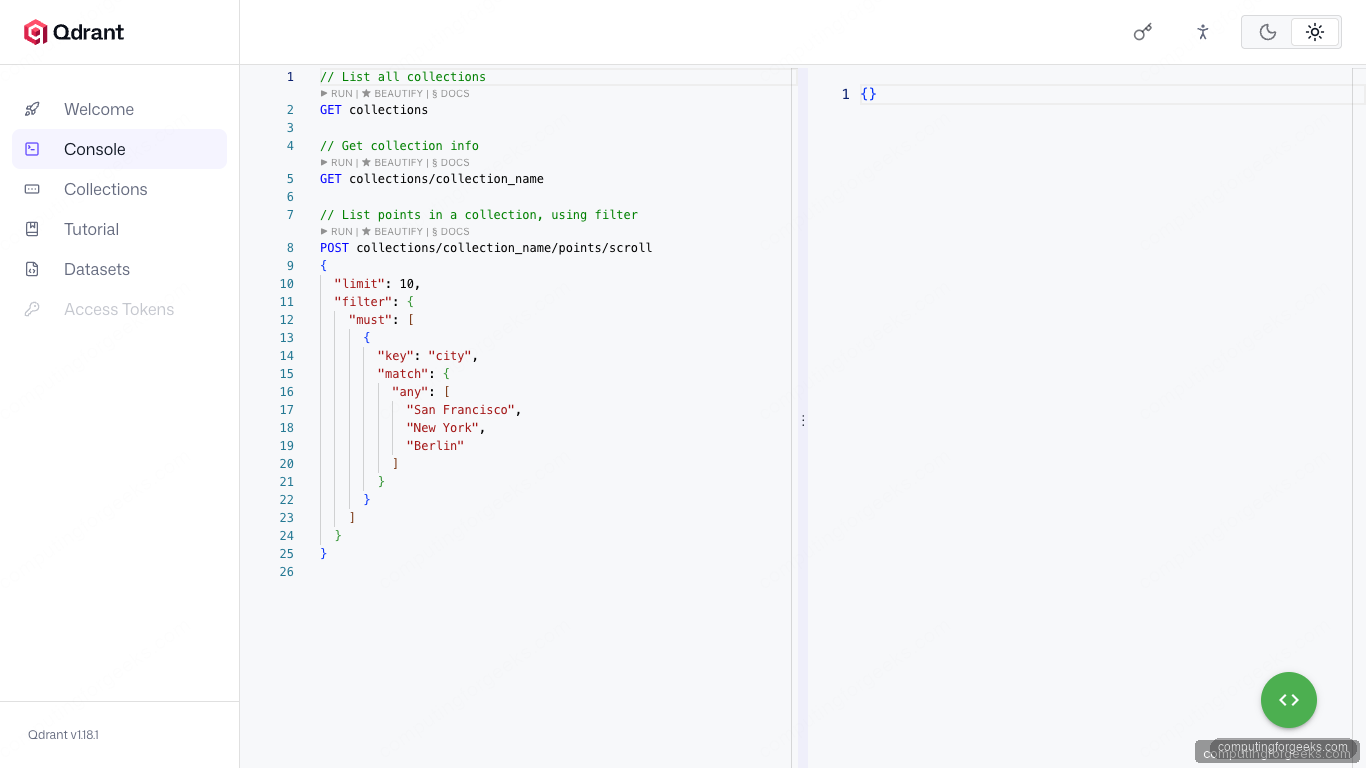 Docker Compose alternativeIf you prefer Compose, the equivalent setup with an API key and a memory limit fits in one file. Save this as Generate a strong API key and bring the stack up: Every subsequent curl now needs the Method 2: Native .deb install with systemdThe native path drops the Docker layer and lets Download the official .deb for the latest release. The release page publishes Create a dedicated system user and storage directory, then drop a systemd unit: Write the unit file at Reload The same health endpoint works against the native install: Open the firewall safelyNever expose Qdrant on a public interface without authentication. The default Docker run is open, which is fine on a laptop and dangerous on a VPS. If UFW is enabled, allow REST and gRPC from a trusted CIDR only: For internet facing deployments, bind Qdrant to Upgrade QdrantUpgrades are usually a tag swap. With Docker, stop the container, re-detect the latest tag, and recreate. The storage volume persists across the swap: With Docker Compose, edit Troubleshooting common issuesPort 6333 already in useIf Container restarts in a loopLook at the logs first. The most common culprit is a permission error on the bind mount when SELinux or AppArmor labels conflict: Web UI loads but Collections list is emptyThe Web UI ships empty on a fresh install. Create your first collection through the Console panel or via curl, then click the refresh icon next to the Collections heading. Where to nextYou now have a working Qdrant on Ubuntu, a sample collection, and the Web UI for quick experiments. The series builds outward from here: secure Qdrant with API key, TLS, and Nginx is the next stop for any host reachable beyond localhost, and the Qdrant Web UI tour covers every panel in the dashboard. To wire Qdrant into a local LLM pipeline, our self hosted RAG with Ollama guide pairs naturally with Qdrant as a drop in for the vector store, and the Ollama commands cheat sheet covers the embedding side. 
Josphat Mutai
Founder of Computingforgeeks. Senior Systems Engineer with over a decade of hands-on experience building and managing production infrastructure. Core expertise in Linux/UNIX administration, cloud platforms (AWS, GCP, Azure), and Kubernetes ecosystems (EKS, GKE, OpenShift). Deep experience with virtualization (KVM, Proxmox, OpenStack), infrastructure as code (Terraform, Terragrunt, Ansible, Crossplane), GitOps workflows (ArgoCD, FluxCD), Nix/NixOS, and container orchestration at scale. Currently focused on integrating AI and LLMs into DevOps and platform engineering workflows. Every guide on this site is tested on real systems before publishing. Keep reading Ubuntu
Upgrade Ubuntu 24.04 to Ubuntu 26.04 LTS (Step by Step)  Security
UFW Firewall Commands with Examples on Ubuntu 26.04 / 24.04  AI
Ollama Models Cheat Sheet: Best Models by VRAM, Tested (PDF)  Debian
Install TLP on Ubuntu, Fedora, Debian: Profiles and PPD Conflict  AI
OpenClaw Security Hardening with Ollama: Sandbox, Tools, Skills  Security
Install Linux Malware Detect on CentOS / Fedora / Ubuntu / Debian Leave a Comment Cancel reply
|
| You are visitor 01402503 — GeezerVison does not store the pages you look up. Best viewed with Netscape Navigator 4.7 or Internet Explorer 6 at 800×600. No cookies required. |