GeezerVisonThe World Wide Web, restored to 800 pixels of glory. |
| Home|About|Gaming cabinet|Archives|How it works|Starter sites |
GeezerVison is showing docs.github.com — Hello World - GitHub Docs Hello WorldFollow this Hello World exercise to learn GitHub's pull request workflow. In this articleIntroductionThis tutorial teaches you GitHub essentials like repositories, branches, commits, and pull requests. You'll create your own Hello World repository and learn GitHub's pull request workflow, a popular way to create and review code. In this quickstart guide, you will:
Prerequisites
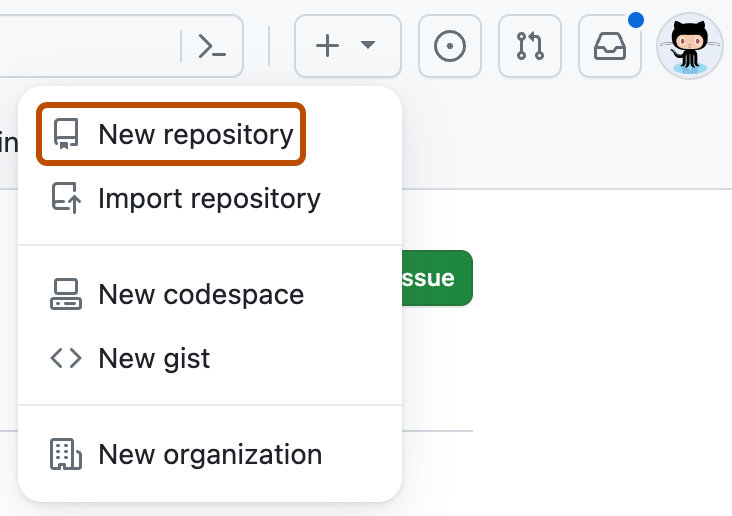
Step 1: Create a repositoryThe first thing we'll do is create a repository. You can think of a repository as a folder that contains related items, such as files, images, videos, or even other folders. A repository usually groups together items that belong to the same "project" or thing you're working on. Often, repositories include a README file, a file with information about your project. README files are written in Markdown, which is an easy-to-read, easy-to-write language for formatting plain text. You can learn more about Markdown and README files in Basic writing and formatting syntax and Managing your profile README. GitHub lets you add a README file at the same time you create your new repository. GitHub also offers other common options such as a license file, but you do not have to select any of them now. Your
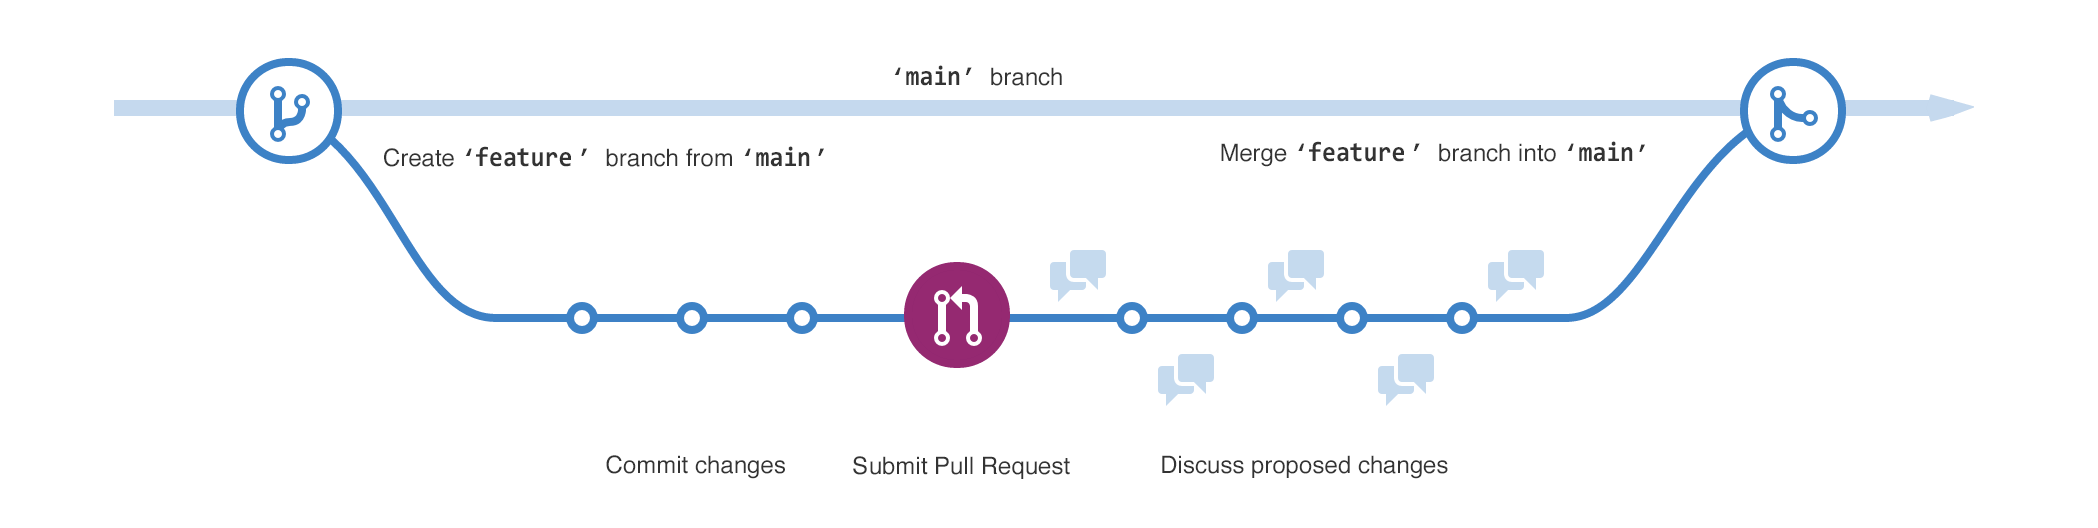
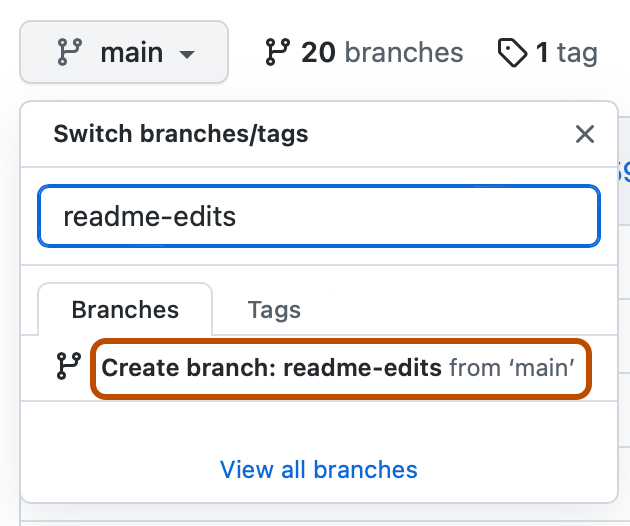
Step 2: Create a branchBranching lets you have different versions of a repository at one time. By default, your repository has one branch named Branching is helpful when you want to add new features to a project without changing the main source of code. The work done on different branches will not show up on the main branch until you merge it, which we will cover later in this guide. You can use branches to experiment and make edits before committing them to When you create a branch off the This diagram shows:
Creating a branch
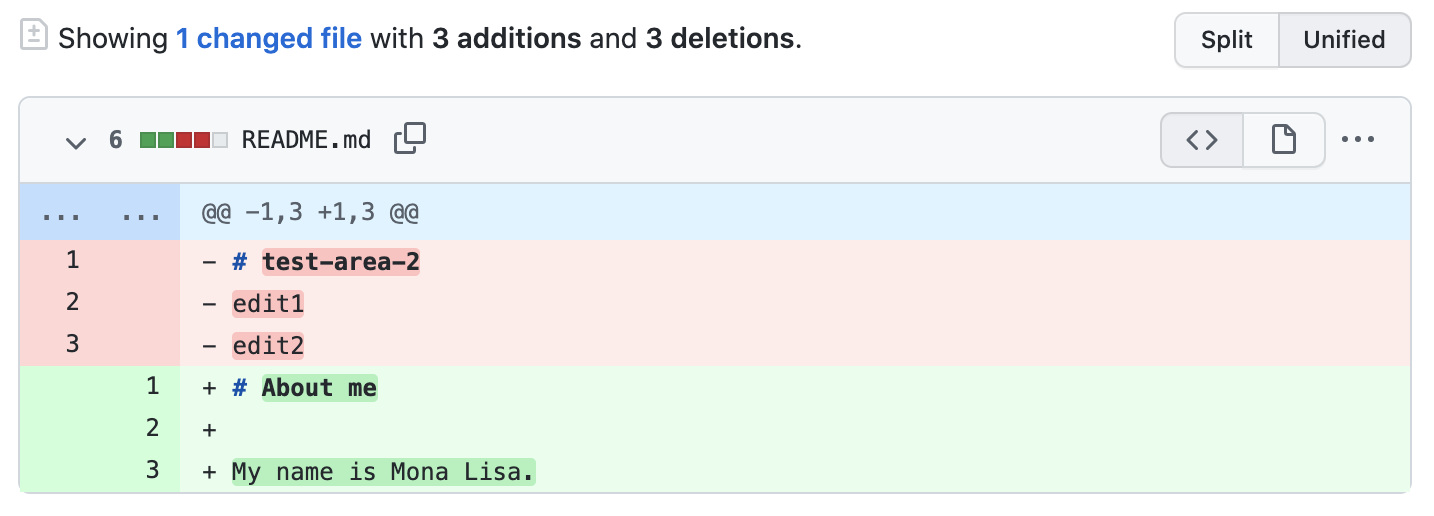
Now you have two branches, Step 3: Make and commit changesWhen you created a new branch in the previous step, GitHub brought you to the code page for your new You can make and save changes to the files in your repository. On GitHub, saved changes are called commits. Each commit has an associated commit message, which is a description explaining why a particular change was made. Commit messages capture the history of your changes so that other contributors can understand what you’ve done and why.
These changes will be made only to the README file on your Step 4: Open a pull requestNow that you have changes in a branch off of Pull requests are the heart of collaboration on GitHub. When you open a pull request, you're proposing your changes and requesting that someone review and pull in your contribution and merge them into their branch. Pull requests show diffs, or differences, of the content from both branches. The changes, additions, and subtractions are shown in different colors. As soon as you make a commit, you can open a pull request and start a discussion, even before the code is finished. In this step, you'll open a pull request in your own repository and then merge it yourself. It's a great way to practice the GitHub flow before working on larger projects.
Reviewing a pull requestWhen you start collaborating with others, this is the time you'd ask for their review. This allows your collaborators to comment on, or propose changes to, your pull request before you merge the changes into the We won't cover reviewing pull requests in this tutorial, but if you're interested in learning more, see Pull request reviews. Alternatively, try the GitHub Skills "Reviewing pull requests" course. Step 5: Merge your pull requestIn this final step, you will merge your Sometimes, a pull request may introduce changes to code that conflict with the existing code on In this walk-through, you should not have any conflicts, so you are ready to merge your branch into the main branch.
ConclusionBy completing this tutorial, you've learned to create a project and make a pull request on GitHub. As part of that, we've learned how to:
Next steps
Further reading |
| You are visitor 01402503 — GeezerVison does not store the pages you look up. Best viewed with Netscape Navigator 4.7 or Internet Explorer 6 at 800×600. No cookies required. |