GeezerVisonThe World Wide Web, restored to 800 pixels of glory. |
| Home|About|Gaming cabinet|Archives|How it works|Starter sites |
GeezerVison is showing docs.wpilib.org — WPILib Installation Guide WPILib Installation GuideThis guide will walk you through installing the WPILib development environment on your computer. This includes the WPILib tools, Visual Studio Code, and all dependencies needed to develop and deploy code to the roboRIO. WPILib Installation is required for Java and C++ teams. LabVIEW teams can skip to Installing LabVIEW for FRC (LabVIEW only). Python teams can do a full install per these instructions to get a Visual Studio Code environment with some python extensions, or do a tools only installation to install dashboards such as Shuffleboard and Elastic. Python teams additionally need to follow the Python Installation Guide. Prerequisites
Warning The following OSes are no longer supported: macOS 12 or earlier, Ubuntu 18.04 & 20.04, Windows 7, Windows 8.1, and any 32-bit Windows. Note Windows 10 support from Microsoft ended in October 2025. We intend to continue supporting Windows 10 through the 2026 season, but may have to drop support in 2027. Teams should start planning their upgrade path to Windows 11, or switch to one of the supported Linux distributions listed. Note C++ compilation is memory intensive. A minimum of 32 GB of RAM is recommended for C++ teams. This tutorial shows Windows 11, but the steps are identical for all operating systems. Notes differentiating operating systems will be shown. WPILib is designed to install to different folders for different years, so that it is not necessary to uninstall a previous version before installing this year’s WPILib. DownloadingWPILib Installer
WPILib 2026.2.1 Release - January 16, 2026
Release NotesThis is an update release of WPILib for the 2026 season. This release adds 2026 season-specific field images and AprilTag information as well as a handful of other minor improvements and fixes. This upgrade is recommended for all teams. Upgrading from earlier 2026 releases is easy: simply download and run the new installer and it will update your current installation. If you already have the 2026 WPILib vscode installed, it will detect it and you can simply click "next" for that installation step. After installation, vscode will prompt you when opening your robot project whether you want to upgrade it to this version. Note that using the installer is required to get the new version of desktop tools such as Elastic and AdvantageScope. This release is compatible with the kickoff release of the RoboRIO image, so there is no need to upgrade the RIO image if you have already done so for 2026. The documentation for WPILib is located at https://docs.wpilib.org/ (if you have trouble accessing this location, https://frcdocs.wpi.edu/en/stable/ is an alternate location with the same content). If you're new to FRC, start with Getting Started. System Requirements: WPILib requires 64-bit Windows 10 or 11 (Arm and 32-bit are not supported), Ubuntu 22.04 or later, or macOS 13.3 or later. C++ teams should note that the latest version of Visual Studio 2022 is required for desktop builds. Mac users will need to have the Xcode Command Line Tools installed before running the installer. This can be done by running If you're returning from a previous season, check out what's new for 2026. You will need a new RoboRIO image for 2026; this is available via the FRC 2026 Game Tools. Follow the WPILib installation guide to install WPILib. If you're starting from a 2025 robot project, you will need to import your project to create a 2026 project. The import process is important, as it will make a few automated corrections for some breaking changes that happened in 2026. It is also necessary to import vendor libraries again, since last year’s vendor libraries must be updated to be compatible with this year’s projects. A complete list of known issues with this release can be found here. WPILib is developed by a small team of volunteers and the FIRST community. Downloads
What's Changed since 2026.1.1WPILib
Math
SysID
Elastic
VS Code
Installer
New Contributors
Full Changelog: https://github.com/wpilibsuite/allwpilib/compare/v2026.1.1...v2026.2.1 MD5 Hashes
SHA256 Hashes
You can also download the latest release of the installer from GitHub. Once on the GitHub releases page, scroll to the Downloads section. 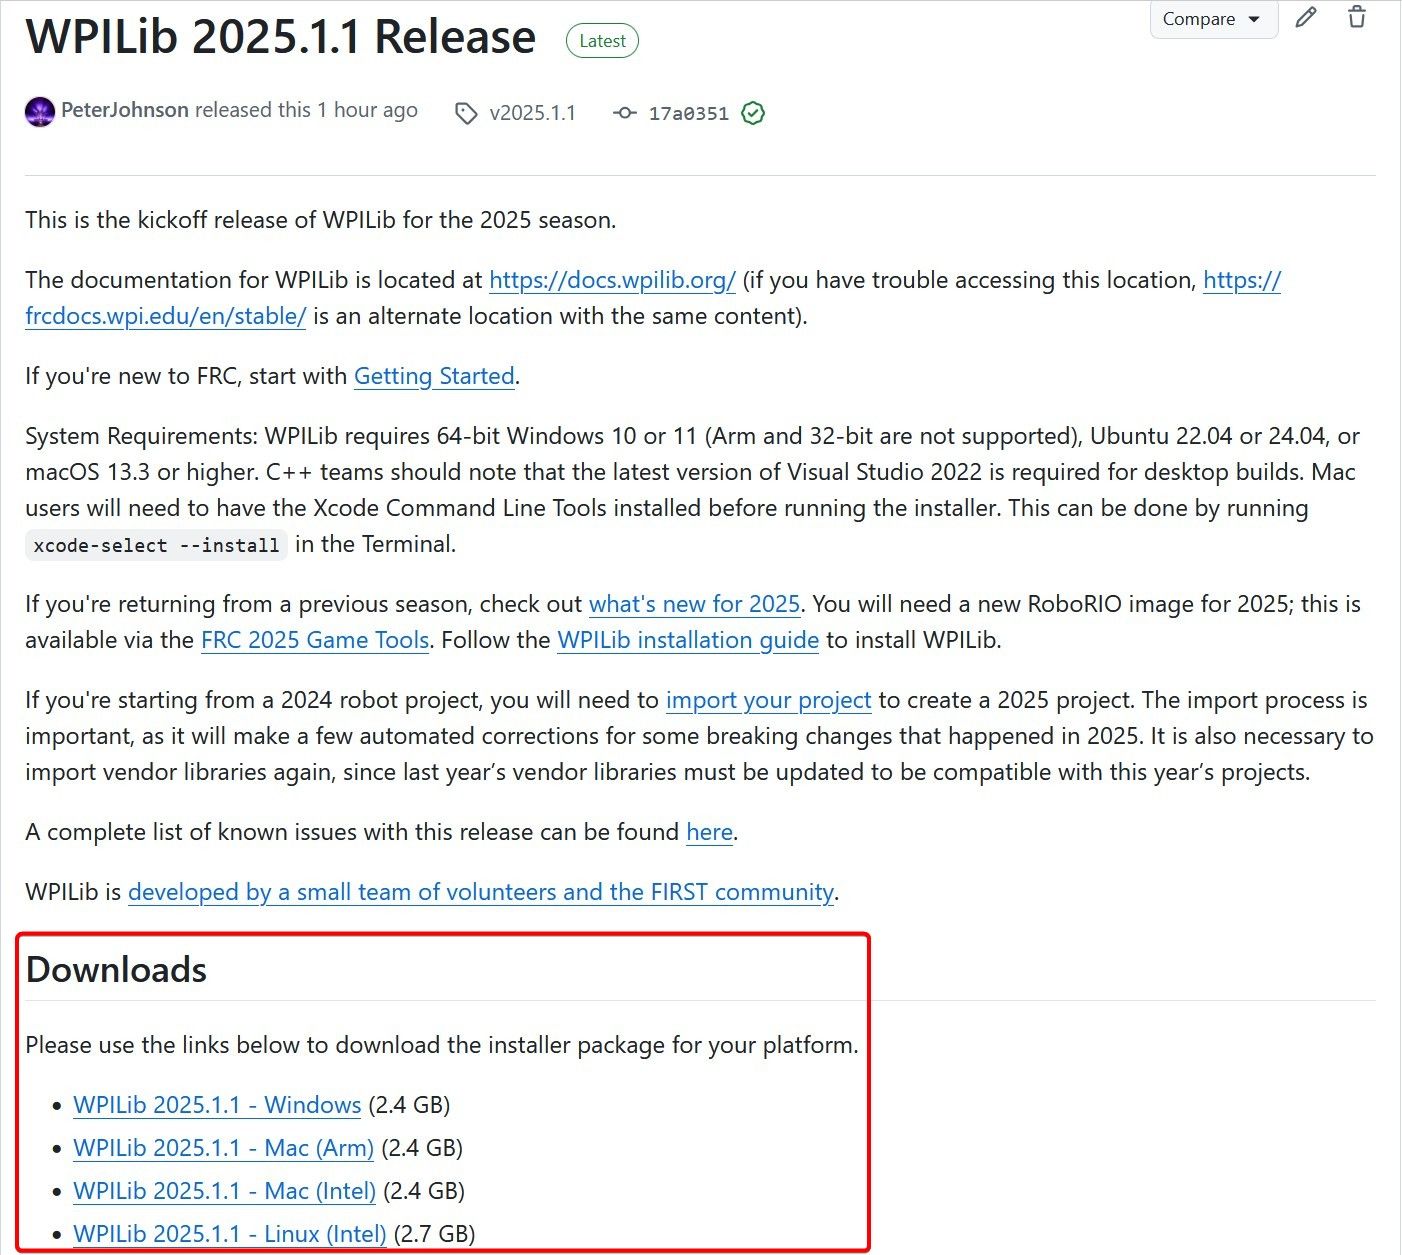 Then click on the correct binary for your OS and architecture to begin the download. Extracting the InstallerWhen you download the WPILib installer, it is distributed as a disk image file
Windows 10+
Windows 10+ users can right click on the downloaded disk image and select Mount to open it. Then launch 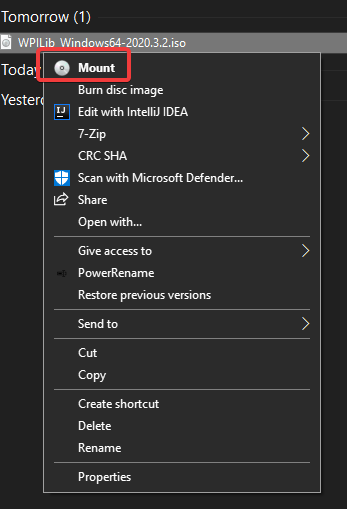 Note Other installed programs may associate with iso files and the mount option may not appear. If that software does not give the option to mount or extract the iso file, then follow the directions below. You can use 7-zip to extract the disk image by right-clicking, selecting 7-Zip and selecting Extract to…. Windows 11 users may need to select Show more options at the bottom of the context menu. 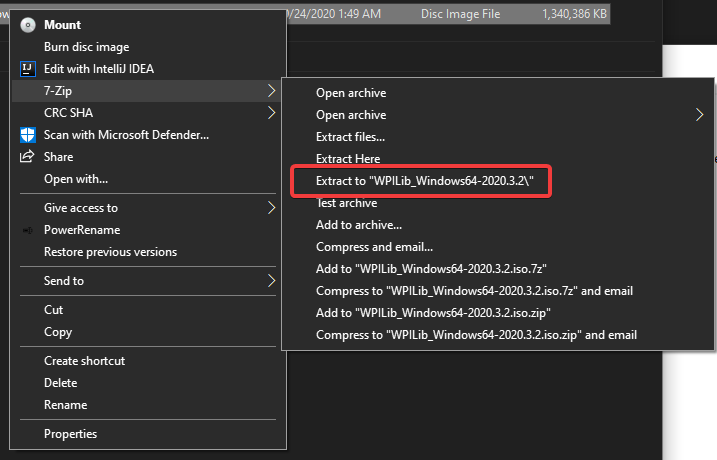 After opening the Note After launching the installer, Windows may display a window titled “Windows protected your PC”. Click More info, then select Run anyway to run the installer. Note Ensure you’ve ejected any previous WPILibInstaller images from the desktop before starting installation macOS users can double click on the downloaded 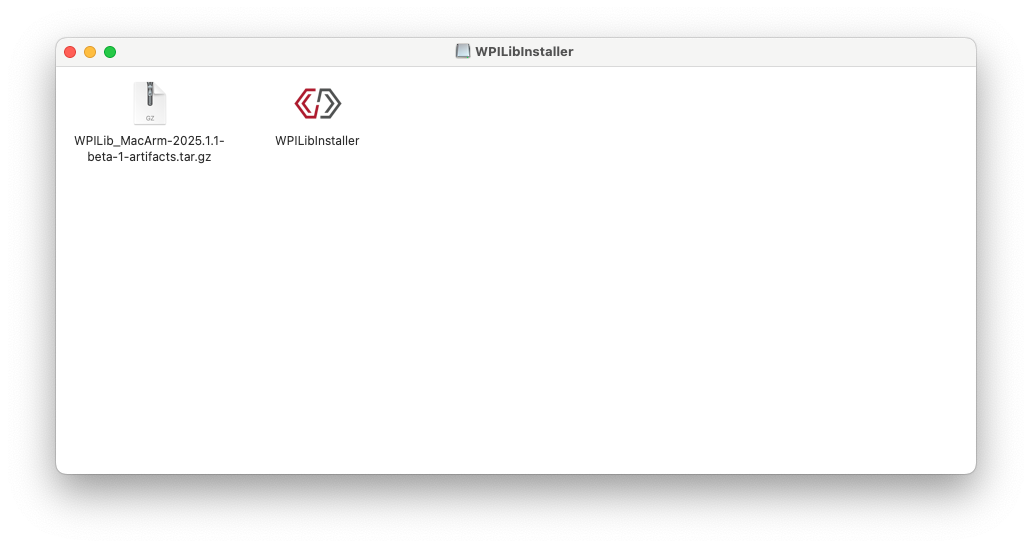 If a warning is shown about WPILibInstaller being downloaded from the internet, select Open. 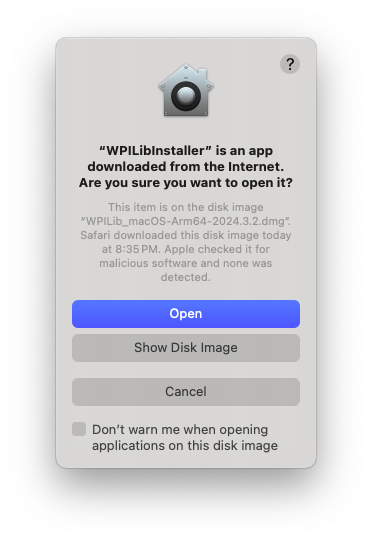 Linux users should extract the downloaded $ tar -xf WPILib_Linux-<version>.tar.gz $ cd WPILib_Linux-<version>/ $ ./WPILibInstaller Running the InstallerUpon opening the installer, you’ll be presented with the below screen. Go ahead and press Start. 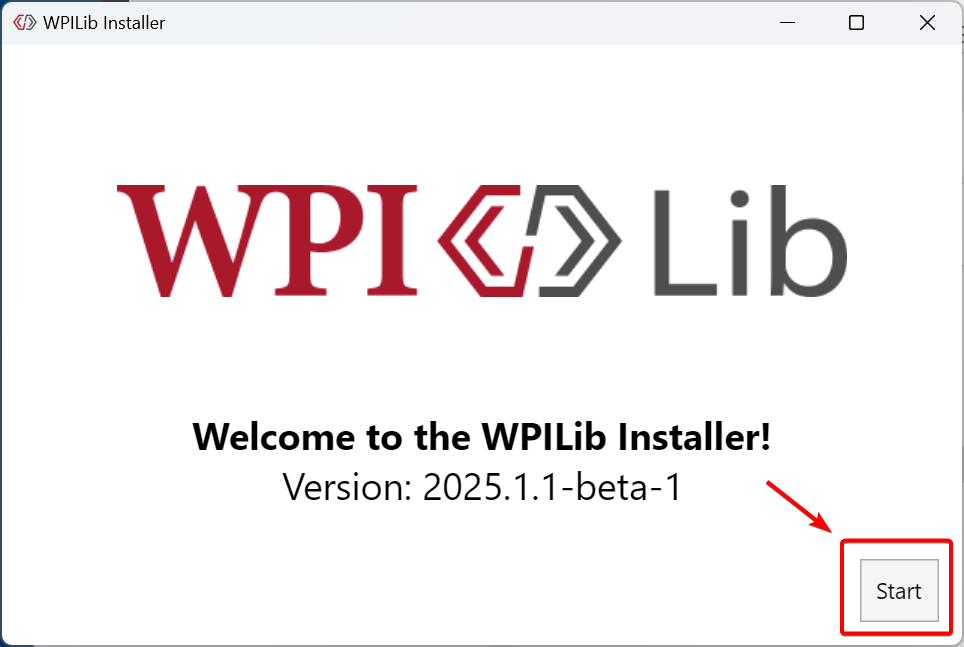 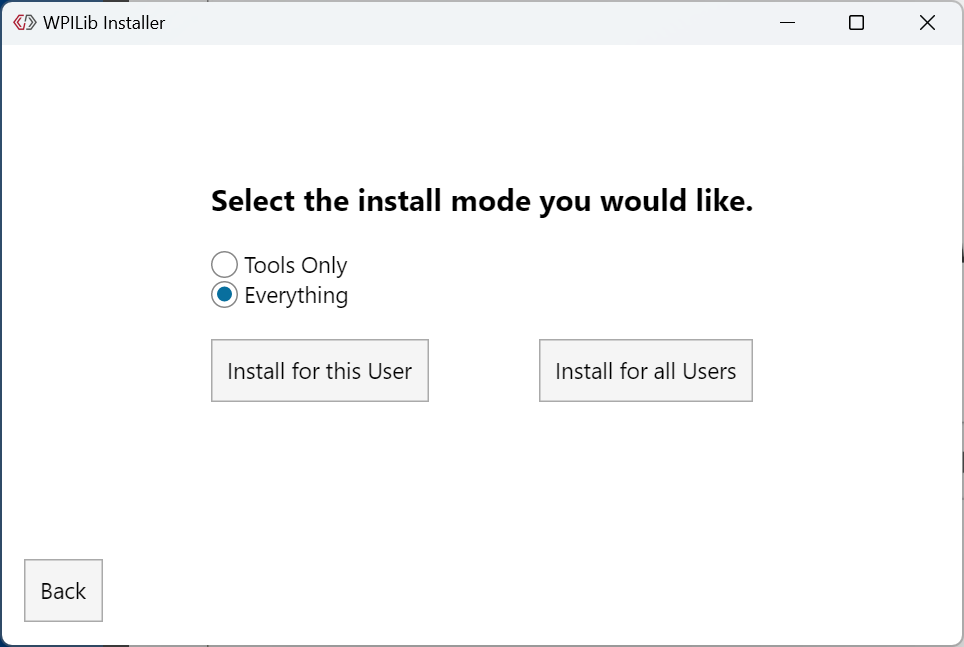 This showcases a list of options included with the WPILib installation.
You will notice two buttons, Install for this User and Install for all Users. Install for this User only installs it on the current user account, and does not require administrator privileges. However, Install for all Users installs the tools for all system accounts and will require administrator access. Install for all Users is not an option for macOS and Linux. Note If you select Install for all Users, Windows will prompt for administrator access through UAC during installation. Select the option that is appropriate for you, and you’ll presented with the following installation screen. This next screen involves downloading VS Code. Unfortunately, due to licensing reasons, VS Code can not be bundled with the installer. 
Go ahead and select Download for this computer only. This will begin the download process and can take a bit depending on internet connectivity (it’s ~150MB). Once the download is done, select Next. You should be presented with a screen that looks similar to the one below. Note teams upgrading from Beta will already have a version of VS Code installed. However, it’s still recommended to select Download for this computer only to ensure the latest recommended version of VS Code is installed 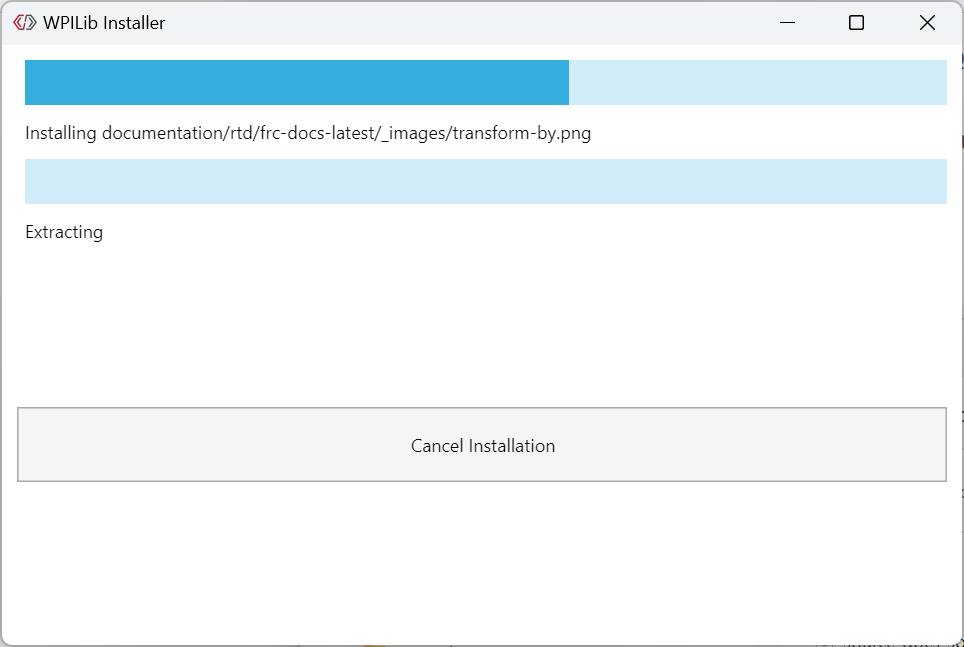 After installation is complete, you will be presented with the finished screen.  Important WPILib installs a separate version of VS Code. It does not use an already existing installation. Each year has it’s own copy of the tools appended with the year. IE: Congratulations, the WPILib development environment and tooling is now installed on your computer! Press Finish to exit the installer. Post-InstallationSome operating systems require some final action to complete installation.
macOS
After installation, the installer opens the WPILib VS Code folder. Drag the VS Code application to the dock. Eject WPILibInstaller image from the desktop. Some versions of Linux (e.g. Ubuntu 22.04 and later) require you to give the desktop shortcut the ability to launch. Right click on the desktop icon and select Allow Launching. 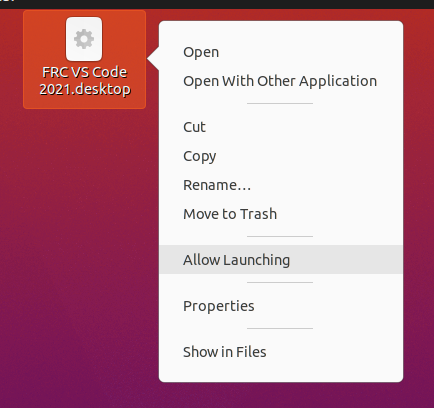 Ubuntu 23.10 and later disable the kernel user namespaces feature for unknown applications. This means that the sandboxing feature won’t work on the WPILib VS Code. To enable sandboxing for the WPILib applications, AppArmor profiles are provided, and can be installed using the command below. $ sudo cp ~/wpilib/YEAR/frccode/AppArmor/* /etc/apparmor.d/ $ sudo systemctl reload apparmor.service The above will fix the following error: The SUID sandbox helper binary was found, but is not configured correctly. Rather than run without sandboxing I'm aborting now. You need to make sure that ~/wpilib/2026/advantagescope/chrome-sandbox is owned by root and has mode 4755.
Note Installing desktop tools and rebooting will create a folder on the desktop called Additional C++ Installation for SimulationC++ robot simulation requires that a native compiler to be installed. For Windows, this would be Visual Studio 2022 version 17.9 or later (not VS Code), macOS requires Xcode 14 or later, and Linux (Ubuntu) requires the Ensure the Desktop Development with C++ option is checked in the Visual Studio installer for simulation support. 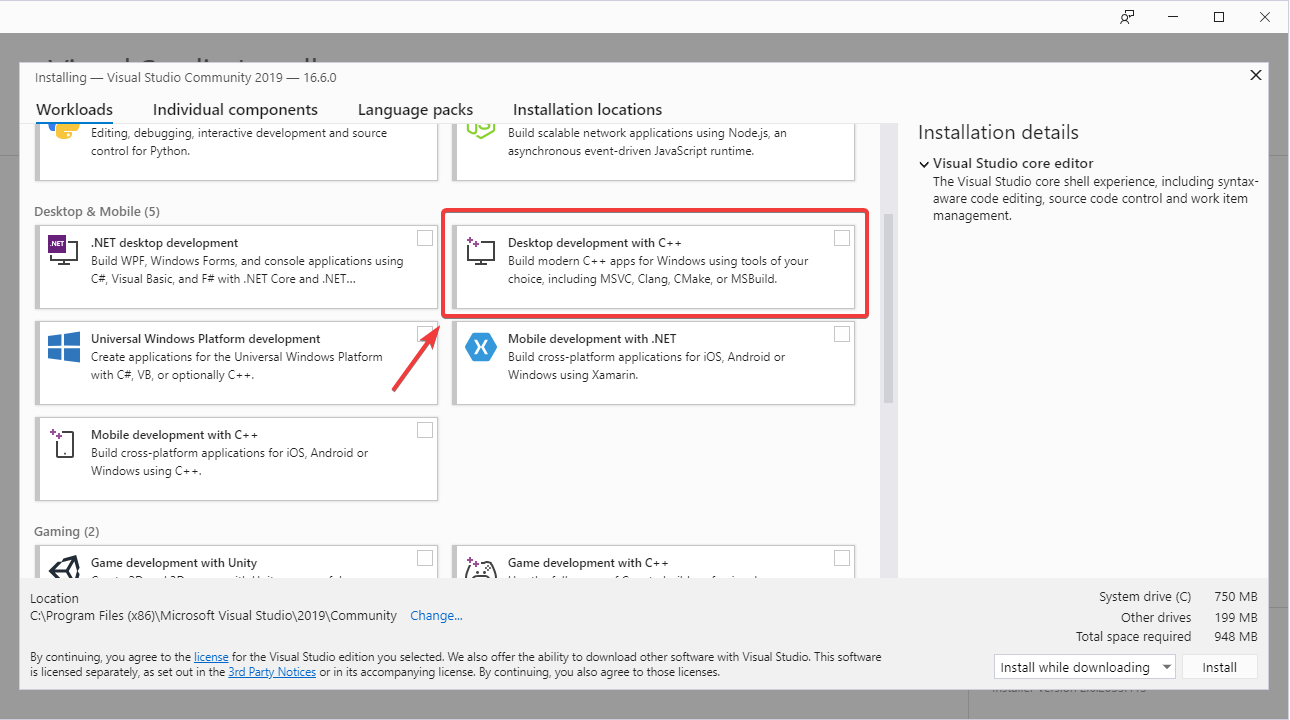 What is Installed?The Offline Installer installs the following components:
Note It’s not recommended to use the VS Code Backup and Settings Sync feature to sync settings between a regular VS Code installation and the FRC VS Code installation. This could lead to either installation being broken. UninstallingWPILib is designed to install to different folders for different years, so that it is not necessary to uninstall a previous version before installing this year’s WPILib. However, the following instructions can be used to uninstall WPILib if desired.
Windows
TroubleshootingIn case the installer fails, please open an issue on the installer repository. A link is available here. The installer should give a message on the cause of the error, please include this in the description of your issue. |
| You are visitor 01402605 — GeezerVison does not store the pages you look up. Best viewed with Netscape Navigator 4.7 or Internet Explorer 6 at 800×600. No cookies required. |