CLI for scaffolding oe-cloud based applications.
This project is modification of original project yeoman/yo
This project is changed from original project for,
- Changing the route
- Adding organisation specific documentation in help section
- Changing code to make it work with corporate proxy
- Organisation branding added
Please visit yeoman/yo for original documentation.
# install oe-cloud-cli
$ npm install -g oe-cloud-cli


# start cli
$ oe

-
Run
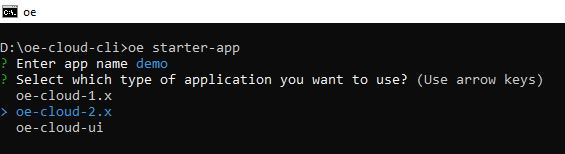
oe starter-appto create a new oe-cloud application.$ oe starter-app
-
The oe-Cloud application generator will prompt you for the name of the application. For example, type demo as the name of the application
-
Select what kind of application you want to create
3.1 If selecting oe-cloud-2.x (default selection)
 3.1.1 If selecting **oe-cloud-2.x-server**  3.1.2 If selecting **oe-cloud-2.x-serverUI**  3.1.3 If selecting **oe-cloud-2.x-serverUI** and **Enable oe-studio** Press Enter to accept default value of Application Description, Version and Author. For oe-cloud 2.0 application, select oe-cloud modules from the checklist using Space Bar Button. Hit Enter to complete module selection.
3.2 If selecting oe-cloud-1.x
Press Enter to accept default value of Application Description, Version and Author.
3.3 If selecting oe-cloud-ui
Press Enter to accept default value of Application Description, Version and Author.
-
The generator will then display messages as it scaffolds the application including:
4.1 Initializing the project folder structure.
4.2 Creating default JSON and JS files.
4.3 Downloading and installing dependent Node modules (as if you had manually done npm install).
-
Run
node .to start the scaffolded server for oe-cloud 1.x and oe-cloud 2.x application -
Run
npm startto start oe-cloud ui application

oe-cloud-cli helps you to kickstart new projects, prescribing best practices and tools to help you stay productive.
oe-cloud-cli provides the option to create model, datasource, property, relation, acl and middleware.
# cli to create datasource
$ oe create datasource

# cli to create model
$ oe create model

# cli to create property
$ oe create property

# cli to create relation
$ oe create relation

# cli to create acl
$ oe create acl

# cli to create middleware
$ oe create middleware
oe-cloud-cli also enables the user to perform few basic oe cloud functionalities from command line.
- default-ui: Allows the user the generate default UIRoute,NavigationLink and UIComponent for the selected Model.
- ui-route: Allows the user to enter initial data for UIRoute model
- navigation-link: Allows the user to enter initial data for NavigationLink model
- workflow: Allow user the attach workflow to a model from the selected list
- business-rules: Allow user to attach the business-rules to the model.
# cli to define default UI
$ oe define default-ui

# cli to define UI route
$ oe define ui-route

# cli to define navigation link
$ oe define navigation-link

# cli to attach workflow to model
$ oe attach workflow

# cli to attach business rule to model
$ oe attach business-rules