GV

GeezerVison

The World Wide Web, restored to 800 pixels of glory.

Home|About|Gaming cabinet|Archives|How it works|Starter sites

On this site

  • The Python Code
  • Tutorials
  • Ethical Hacking
  • Machine Learning
  • General Python Tutorials
  • Web Scraping
  • Finance
  • Computer Vision
  • Python Standard Library
  • Application Programming Interfaces
  • Database
  • Game Development
  • Web Programming
  • Digital Forensics

This view

  • Original page
  • New address

GeezerVison is showing thepythoncode.com — How to Apply HOG Feature Extraction in Python - The Python Code

Kickstart your coding journey with our Python Code Assistant. An AI-powered assistant that's always ready to help. Don't miss out!

The Histogram of Oriented Gradients (HOG) is a feature descriptor used in computer vision and image processing applications for the purpose of object detection. It is a technique that counts events of gradient orientation in a specific portion of an image or region of interest.

In 2005, Dalal and Triggs published a research paper named Histograms of Oriented Gradients for Human Detection. After the release of this paper, HOG is used in many object detection applications.

Here are the most important aspects of HOG:

  • HOG focuses on the structure of the object. It extracts information about the edge's magnitude as well as the orientation of the edges.
  • It uses a detection window of 64x128 pixels, so the image is first converted into (64, 128) shape.
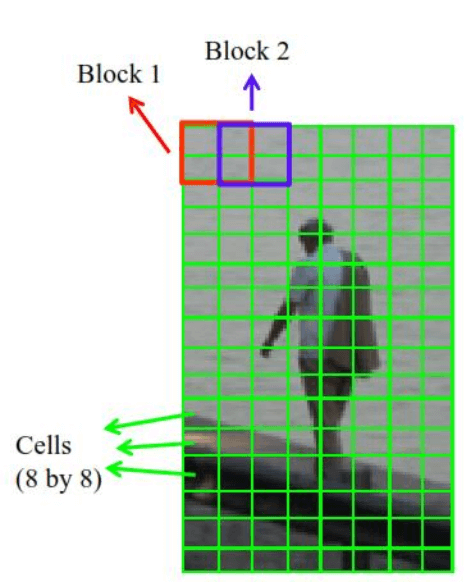
  • The image is then further divided into small parts, and then the gradient and orientation of each part are calculated. It is divided into 8x16 cells into blocks with 50% overlap, so there are going to be 7x15 = 105 blocks in total, and each block consists of 2x2 cells with 8x8 pixels.
  • We take the 64 gradient vectors of each block (8x8 pixel cell) and put them into a 9-bin histogram.

Blocks & Cells in HOGBelow are the essential steps we take on HOG feature extraction:

Resizing the Image

As mentioned previously, if you have a wide image, then crop the image to the specific part in which you want to apply HOG feature extraction, and then resize it to the appropriate shape.

Calculating Gradients

Now, after resizing, we need to calculate the gradient in the x and y directions. The gradient simply involves small changes in the x and y directions; we must convolve two simple filters on the image.

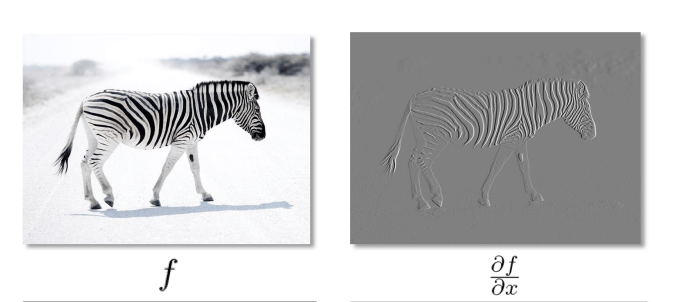
The filter for calculating the gradient in the x-direction is:

x filter for calculating gradientThe following is when we apply this filter to an image:

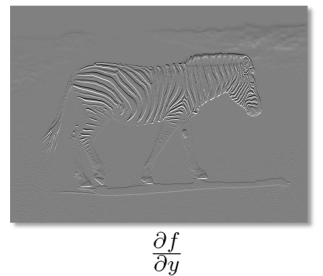
Applied Gradient in X filterThe filter for calculating the gradient in the y-direction is:

Y filterThe following is when we apply this filter to an image:

Applied Gradient in Y

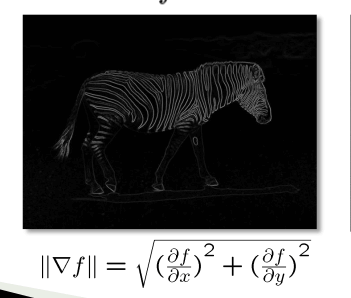
Calculating the Magnitude

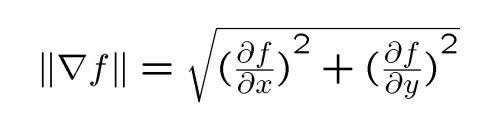
To calculate the magnitude of the gradient, the following formula is used:

Magnitude FormulaMagnitude Formula

Calculating the Orientation

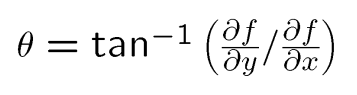
The gradient direction is given by:

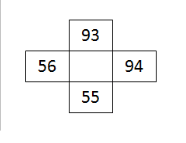
Orientation formulaLet's take an example, say we have the matrix below:

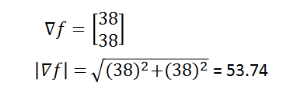
Example MatrixThe gradient in the x-axis will simply be 94-56 = 38, and 93-55 = 38 in the y-axis.

The magnitude will be:

Magnitude ExampleThe gradient direction will be:

Gradient direction

Related: Mastering YOLO: Build an Automatic Number Plate Recognition System with OpenCV in Python.

Python Code

Now that we understand the theory, let's look at how we can use scikit-image library to extract HOG features from images.

First, let's install the necessary libraries for this tutorial:

pip3 install scikit-image matplotlib

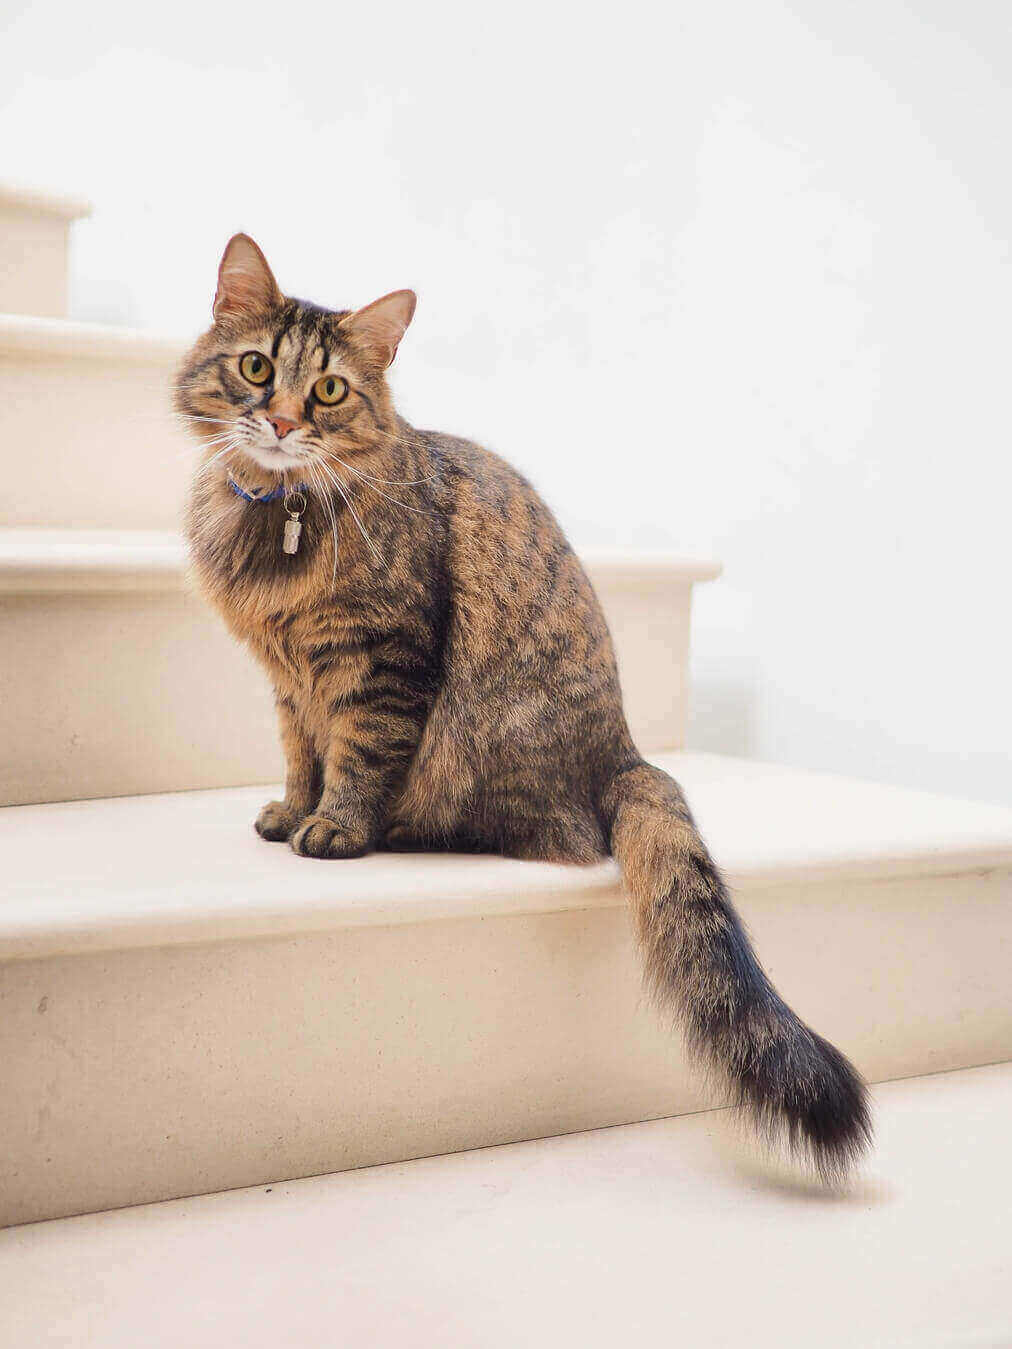
I will perform HOG on a cute cat image, get it here, and put it in the current working directory (you can use any image you want, of course). Let's load the image and show it:

#importing required libraries
from skimage.io import imread
from skimage.transform import resize
from skimage.feature import hog
from skimage import exposure
import matplotlib.pyplot as plt

# reading the image
img = imread('cat.jpg')
plt.axis("off")
plt.imshow(img)
print(img.shape)

Output:

(1349, 1012, 3)

Demo cat imageResizing the image:

# resizing image
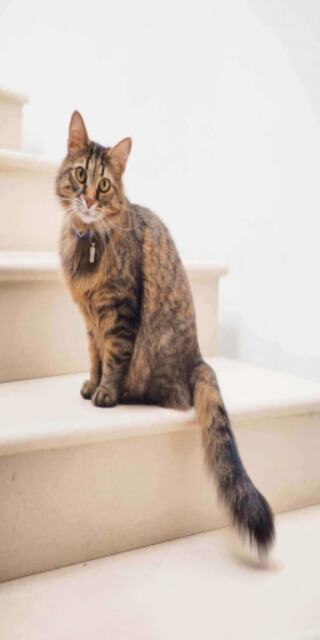
resized_img = resize(img, (128*4, 64*4))
plt.axis("off")
plt.imshow(resized_img)
print(resized_img.shape)

Output:

(128, 64, 3)

Resized Cat ImageNow, we simply use hog() function from scikit-image library:

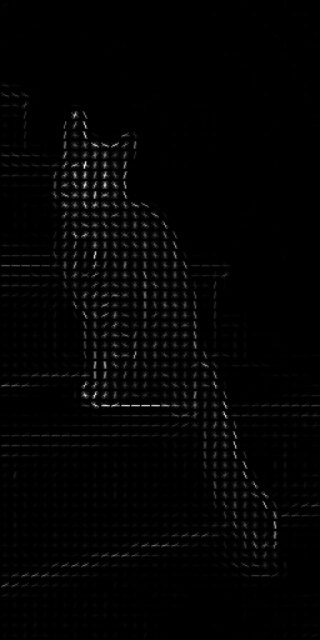
#creating hog features
fd, hog_image = hog(resized_img, orientations=9, pixels_per_cell=(8, 8),
                	cells_per_block=(2, 2), visualize=True, multichannel=True)
plt.axis("off")
plt.imshow(hog_image, cmap="gray")

Output:

HOG Image

The hog() function takes 6 parameters as input:

  • image: The target image for which you want to apply HOG feature extraction.
  • orientations: Number of bins in the histogram we want to create, the original research paper used 9 bins so we will pass 9 as orientations.
  • pixels_per_cell: Determines the size of the cell; as we mentioned earlier, it is 8x8.
  • cells_per_block: Number of cells per block will be 2x2 as mentioned previously.
  • visualize: A boolean is used to decide whether to return the image of the HOG. We set it  True so we can show the image.
  • multichannel: We set it to True to tell the function that the last dimension is considered as a color channel instead of spatial.

Finally, if you want to save the images:

# save the images
plt.imsave("resized_img.jpg", resized_img)
plt.imsave("hog_image.jpg", hog_image, cmap="gray")

Conclusion

Alright, now you know how to perform HOG feature extraction in Python with the help of scikit-image library.

Check the full code here.

Related tutorials:

  • How to Detect Contours in Images using OpenCV in Python.
  • How to Detect Shapes in Images in Python using OpenCV.
  • Mastering YOLO: Build an Automatic Number Plate Recognition System with OpenCV in Python.
  • How to Perform Edge Detection in Python using OpenCV.

Happy Learning ♥

Just finished the article? Now, boost your next project with our Python Code Generator. Discover a faster, smarter way to code.

View Full Code Explain The Code for Me
Sharing is caring!

Read also

SIFT Feature Extraction using OpenCV in Python

Learn how to compute and detect SIFT features for feature matching and more using OpenCV library in Python.
How to Detect Contours in Images using OpenCV in Python

Learning how to detect contours in images for image segmentation, shape analysis and object detection and recognition using OpenCV in Python.
How to Detect Shapes in Images in Python using OpenCV

Detecting shapes, lines and circles in images using Hough Transform technique with OpenCV in Python. Hough transform is a popular feature extraction technique to detect any shape within an image.

Comments

    Got a coding query or need some guidance before you comment? Check out this Python Code Assistant for expert advice and handy tips. It's like having a coding tutor right in your fingertips!


    Get our free Python guides

    Join 50,000+ Python programmers and enthusiasts like you!

    Topics
    Ethical Hacking Machine Learning General Python Tutorials Web Scraping Finance Computer Vision Python Standard Library Application Programming Interfaces Database Game Development Web Programming Digital Forensics Natural Language Processing Healthcare PDF File Handling Python for Multimedia GUI Programming Cryptography Packet Manipulation Using Scapy
    New tutorials View all
    • How AI Text Detection Works: The Technology Behind Modern AI Detectors
    • Beyond Guesswork: How Python Helps Identify AI-Generated Text
    • Discover the Possibilities of Python Programming
    • How to Track Your AI Visibility with Python
    • How to Automate Excel Reports in Python using Openpyxl
    Popular tutorials View all
    • How to Convert Speech to Text in Python
    • How to Read Emails in Python
    • How to Extract Tables from PDF in Python
    • How to Control your Mouse in Python
    • How to Make a Keylogger in Python
    Mastering YOLO - Topic - Bottom CodingFleet - Topic - Bottom
    You are visitor 01402503 — GeezerVison does not store the pages you look up.
    Best viewed with Netscape Navigator 4.7 or Internet Explorer 6 at 800×600. No cookies required.