





AMD Radeon™ GPU Profiler
AMD RGP gives you unprecedented, in-depth access to a GPU. Easily analyze graphics, async compute usage, event timing, pipeline stalls, barriers, bottlenecks, and other performance inefficiencies.
GeezerVisonThe World Wide Web, restored to 800 pixels of glory. | ||||||||||||||||||||||||||||||||||||||||||||||||||||||
| Home|About|Gaming cabinet|Archives|How it works|Starter sites | ||||||||||||||||||||||||||||||||||||||||||||||||||||||
GeezerVison is showing gpuopen.com — Unreal Engine Performance Guide  Performance Guide On this page On this page Unreal Engine Performance GuideUnreal Engine is a leading development environment for games, design visualizations, cinematics, and more. During development with Unreal Engine, as with any real-time application development, it is important to profile your application to ensure performance requirements are being met. This guide is intended to provide practical advice for profiling and optimizing with Unreal Engine. This current version of the performance guide focuses on profiling and optimizing GPU performance. You can find our FidelityFX Super Resolution Unreal Engine plugins at these links:
Profiling in Unreal EngineReduce CPU overhead when profilingThe first question when profiling in UE is what build configuration should be used. When profiling the GPU, you want CPU performance to be fast enough to stay out of the way during profiling. Debug builds should be avoided for profiling, of course, because the engine code is not compiled with optimization enabled. Refer to the UE Build Configuration docs for detailed discussion of this topic. Be aware that Development builds have higher CPU overhead than Test or
Shipping. Still, it can be convenient to profile Development builds
because it gives you full access to the console command configuration
interface (i.e. cvars), making it possible to iterate quickly when
experimenting to find optimal configuration changes. To reduce CPU
overhead in Development builds, you should turn off any unnecessary
processing on the CPU side and avoid profiling in the editor. The editor
can be made to run as the game using the Consider using test builds when profilingTest builds have lower overhead than Development, while still providing some developer functionality. Test builds of a stand-alone executable require cooked content. If you need to iterate while profiling, but want the lower CPU overhead of a Test build, consider using “cook on the fly” (COTF). For example, shader iteration is possible with COTF Test builds. Also note that in some older versions of Unreal Engine, you may have to
manually enable the
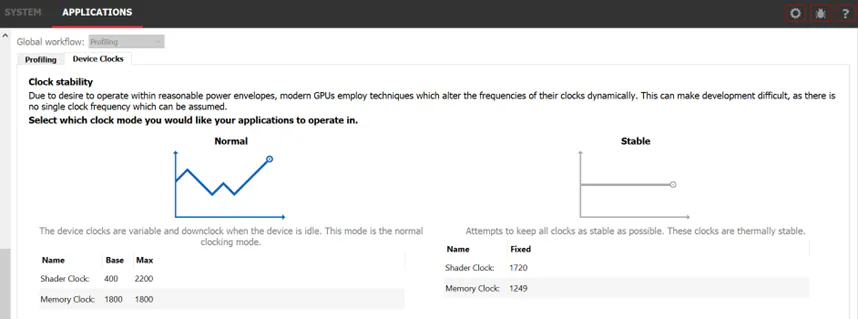
Reducing noise in profiling resultsWhen attempting to optimize the execution time of a workload, we need to be able to reliably measure the time a certain workload takes. These measurements should have as little noise as possible. Otherwise, we cannot tell whether it ran faster because of our optimization or because some random number generator decided to spawn fewer particles (for example). UE has some built-in functionality to help with this. The Below is an example of using these arguments with a Test build of the Infiltrator demo: In the above example, 211x60=12,660 frames using a fixed timestep of 1/60=16.67 milliseconds. This means that, if you have your project set up to run a camera flythrough on startup, it will advance through the flythrough using fixed timesteps and a fixed random seed. It will then shutdown automatically after a fixed number of frames. This can be useful in gathering repeatable average frame time data for your level. Another technique for helping reduce noise in profile results is to run with fixed clocks. Most GPUs have a default power management system that switches to a lower clock frequency when idle to save power. But this trades lower power consumption for performance and can introduce noise in our benchmarks, as the clocks may not scale the same way between runs of our application. You may fix the clocks on your GPU to reduce this variance. Many third-party tools exist, but the Radeon Developer Panel that comes with the Radeon GPU Profiler has a Device Clocks tab under Applications which, after the panel has hooked into an application, can be used to set a stable clock on AMD RDNA™ GPUs, as shown below: Getting back to reducing variability in UE, you may find that some
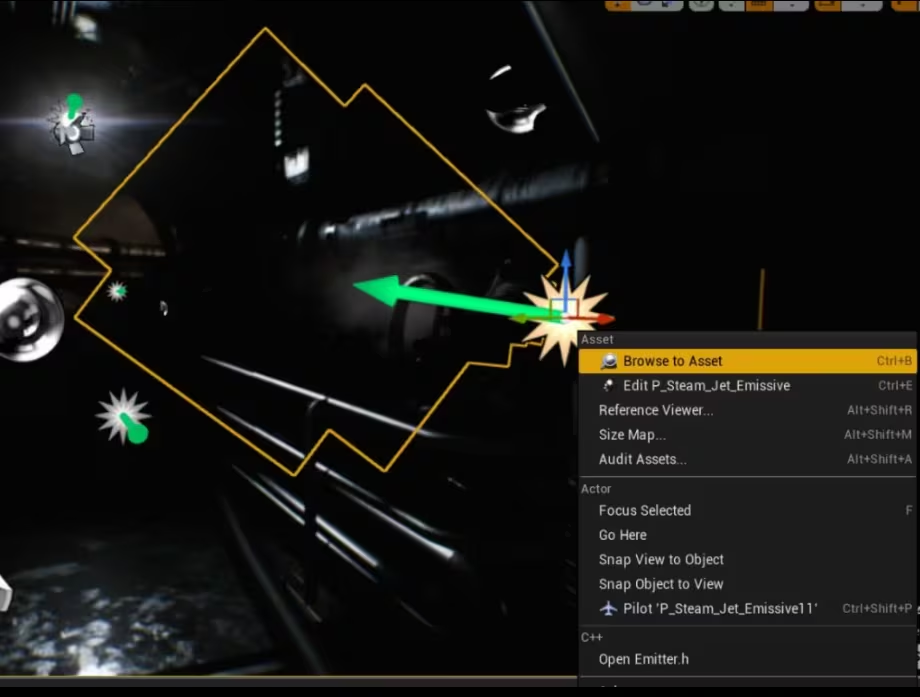
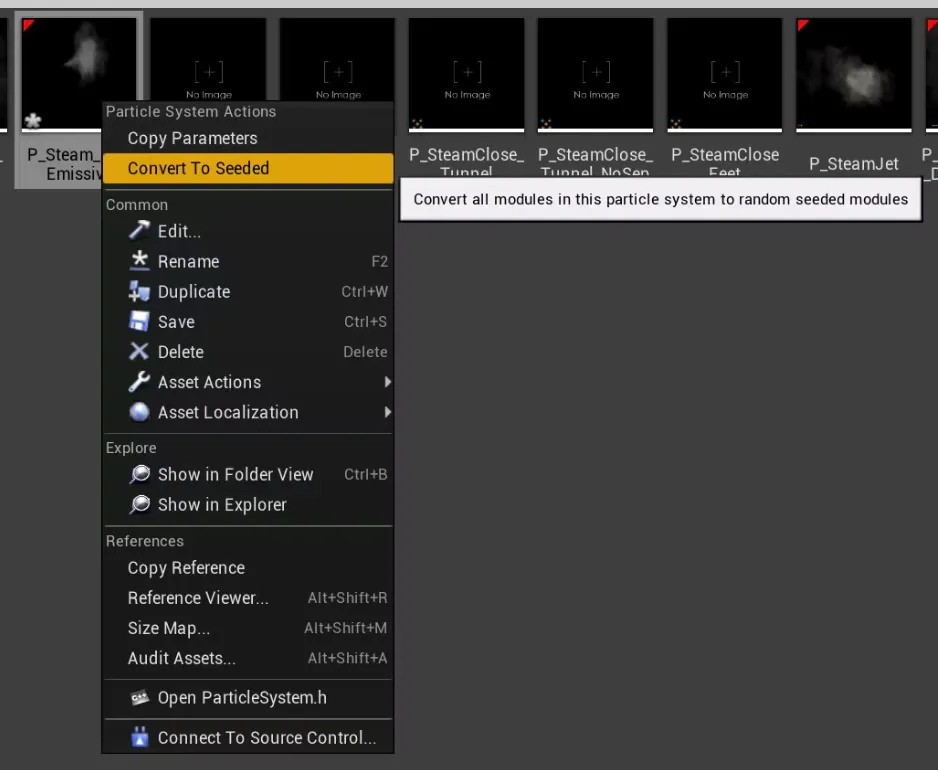
things do not obey the fixed random seed from the The solution to reducing particle noise is to make the Random Number Generators use a fixed seed. This is how you make the particles deterministic in just two clicks:
That’s it! You can also select all your emitters in the Content Browser and convert them all at once. When that has been done the noise will be much reduced and it should be very easy to evaluate your optimizations. Note: If you are using Niagara particles, look for “Deterministic Random Number Generation in Emitter settings” in the official UE docs: https://docs.unrealengine.com/en-US/emitter-settings-reference-for-niagara-effects-in-unreal-engine/ Profiling from a single locationOne way to profile is by going to the same location in your level. A Player Start actor can be used to spawn directly to a specific location upon launch. This can be dragged into the scene through the editor. If you have no way to change the scene in editor mode, or would like to teleport while in-game, then you can use the UCheatManager BugIt tools. Note: BugIt tools are only available in non-shipping builds. To teleport using BugIt:
Profiling along a fixed camera flythrough pathA fixed camera flythrough path is a great way to create a deterministic,
but dynamic scene that better represents your game’s performance, but in
a way that is consistently repeatable and thus more conducive to testing
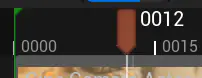
performance enhancements. To start creating a flythrough path, with your
game project open in the UE editor, at the top of the main editor
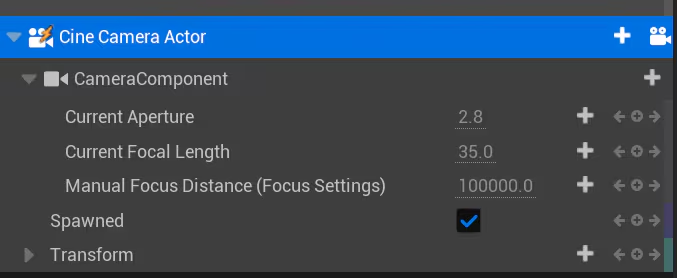
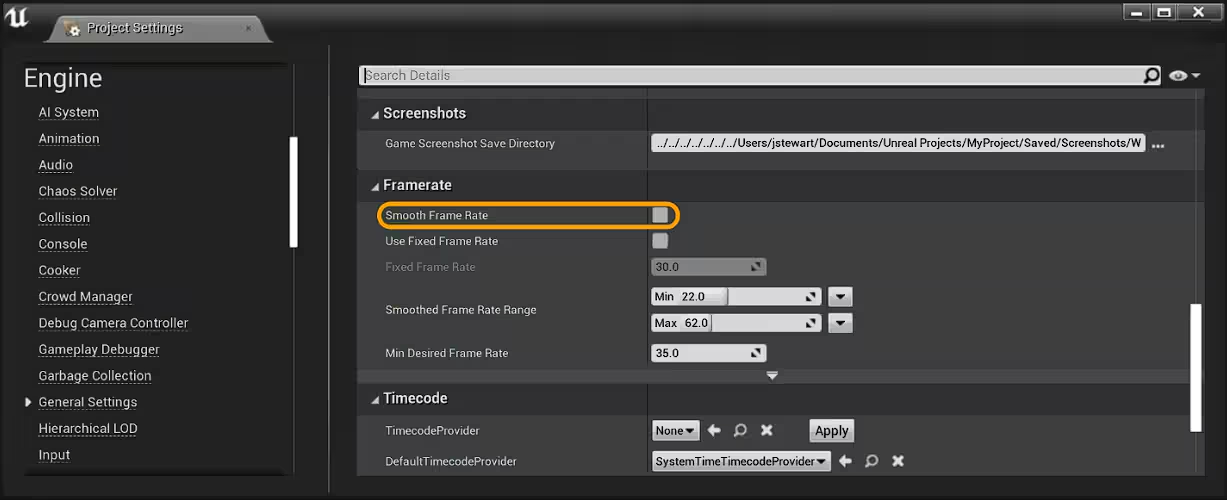
window, select Then proceed to create as many other keyframe locations as desired by moving your viewpoint to a new location, then moving the track time to your desired location in the timeline for the keyframe to exist, and clicking the Transform ’+’ button to save the orientation of the viewpoint to a keyframe. Continue doing this until you have completed your flythrough sequence. At any time during the sequencing, you can press the space bar to play the keyframe sequence as an animation. Finally, you need to create a trigger actor to cause the sequencer animation to start when running the game. This can be done with UE’s blueprint scripting tool, which is outside the scope of this guide, but a quick internet search will most likely reveal tons of tutorial videos if you aren’t familiar with the triggers and/or blueprints in UE. Consider making your own test sceneOptimizing an effect requires trying many experiments, and every iteration takes time. We need to rebuild the game, cook the content, etc. UE features like cook on the fly (COTF) can help with this. But it can also be useful to isolate the effect or technique you are optimizing into a small application. If only we could generate such an app easily! Fortunately, Unreal comes with a feature called Migrate for that. It extracts a certain asset with all its dependencies and will import it in any other project. In this case, for the sake of creating a small app, we would migrate the effect into an empty project. Official documentation on migrating assets: https://docs.unrealengine.com/en-US/migrating-assets-in-unreal-engine Perform last checks before profilingNow that your build is ready for profiling, you should sanity check a few things before getting started. First, ensure Frame Rate Smoothing is disabled. It is disabled by default starting in UE4.24, but it is good to double check. In the editor, you can check in Edit->Project Settings…->Engine ->General Settings->Framerate as shown below: Alternatively, you can ensure Next, turn off VSync. One way to do this is with the Lastly, run your build and verify your resolution in the log file. Resolution is, of course, one very important factor in GPU performance, and it is worth verifying that it is what you expect. Open the log file for your build and look for a line like the following: Other command line parameters to consider using for consistent profiling:
Profiling toolsUnreal Engine has several tools, both external and in-game, for
measuring performance. Epic provides an external tool called Unreal
Insights, which can be found in the engine’s Trace.Send 127.0.0.1 Once performance data has begun to flow, you can use these two commands to start and stop it: Trace.Pause Trace.Resume Refer to the Unreal Insights documentation for complete details on using this tool to measure performance. Unreal Insights is great because it tracks thousands of performance metrics across multiple frames and displays it in a very useful interactive graph format, but sometimes you want to see performance information displayed in real-time in the game itself. Fortunately, UE provides several stat console commands to do just that. Some of the most useful include:
Please refer to UE’s documentation for a full description of all stat commands. Profiling with RGPThe tools described above are great for quantifying your performance and identifying problem areas, but to really analyze and understand what those problem areas are doing and why they are taking as long as they are, you should use AMD’s Radeon™ GPU Profiler (RGP). RGP is a ground-breaking low-level optimization tool that provides detailed information on Radeon™ GPUs. To analyze performance with RGP you must first configure your UE game to
use either the D3D12 RHI or the Vulkan RHI. This guide will use D3D12
for its examples. You can invoke the D3D12 RHI either by running the UE
executable with the Also, it is a good idea to enable UE’s RGP debug markers, by
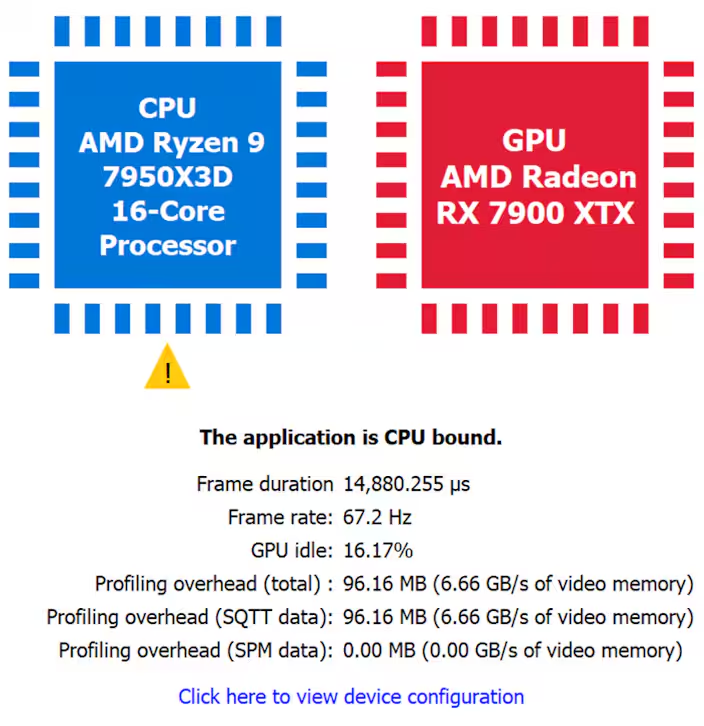
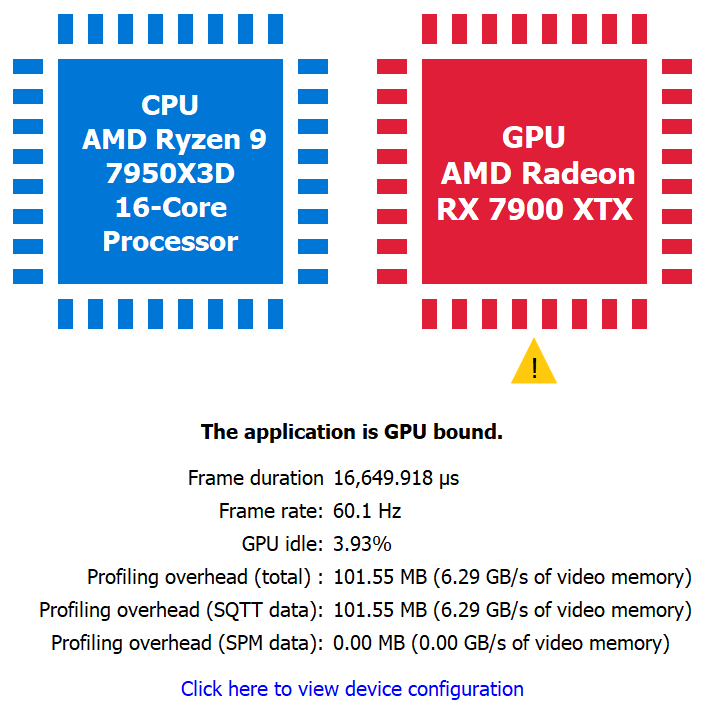
uncommenting the following line in This ensures that any UE code wrapped in a Note: if you are using a Test build, either Also, in order to get the most accurate performance timing, set An easy modification can be applied to the UE source code to eliminate the need to set these variables at runtime. In the function This will prevent the engine from overriding those settings at startup. CPU-bound or GPU-bound?When getting started with performance profiling in UE, it is important to know where the primary performance bottlenecks are when running on the target platform. Depending on whether the bottleneck lies on the CPU or GPU, we may go in orthogonal directions with our performance analysis. After taking a performance capture with the Radeon™ Developer Panel (RDP), these details are available in the Radeon GPU Profiler (RGP) from the Overview->Frame Summary view. The following shows an extreme CPU-bound example, created by adding CPU busy work to UE, followed by a GPU-bound scene. A good sanity test to check if the application is indeed CPU bound is to
scale up the render resolution. For example, if the GPU workload is
increased by setting Once we determine if we are GPU-bound or CPU-bound, we may decide to diagnose further with RGP (if we are GPU-bound) or switch to other tools like AMD uProf (if we are CPU-bound). As mentioned earlier, this version of the guide is focused on the GPU, so we will now discuss how to determine where the GPU’s time is being spent. RGP and UE exampleThis section uses one of our case studies in optimizing Lumen performance to demonstrate using RGP to profile. This example reduces frame time by 0.3ms (measured on Radeon 7900XTX at 4K). This may not seem like much at first, but if you are targeting 60fps for your game, 0.3ms is roughly 2% of your 60-Hz frame budget. After taking a performance capture with RDP, these details are available
in RGP from the Events->Event Timing view. If you are emitting RGP
perf markers, you can quickly navigate to the marker that we are
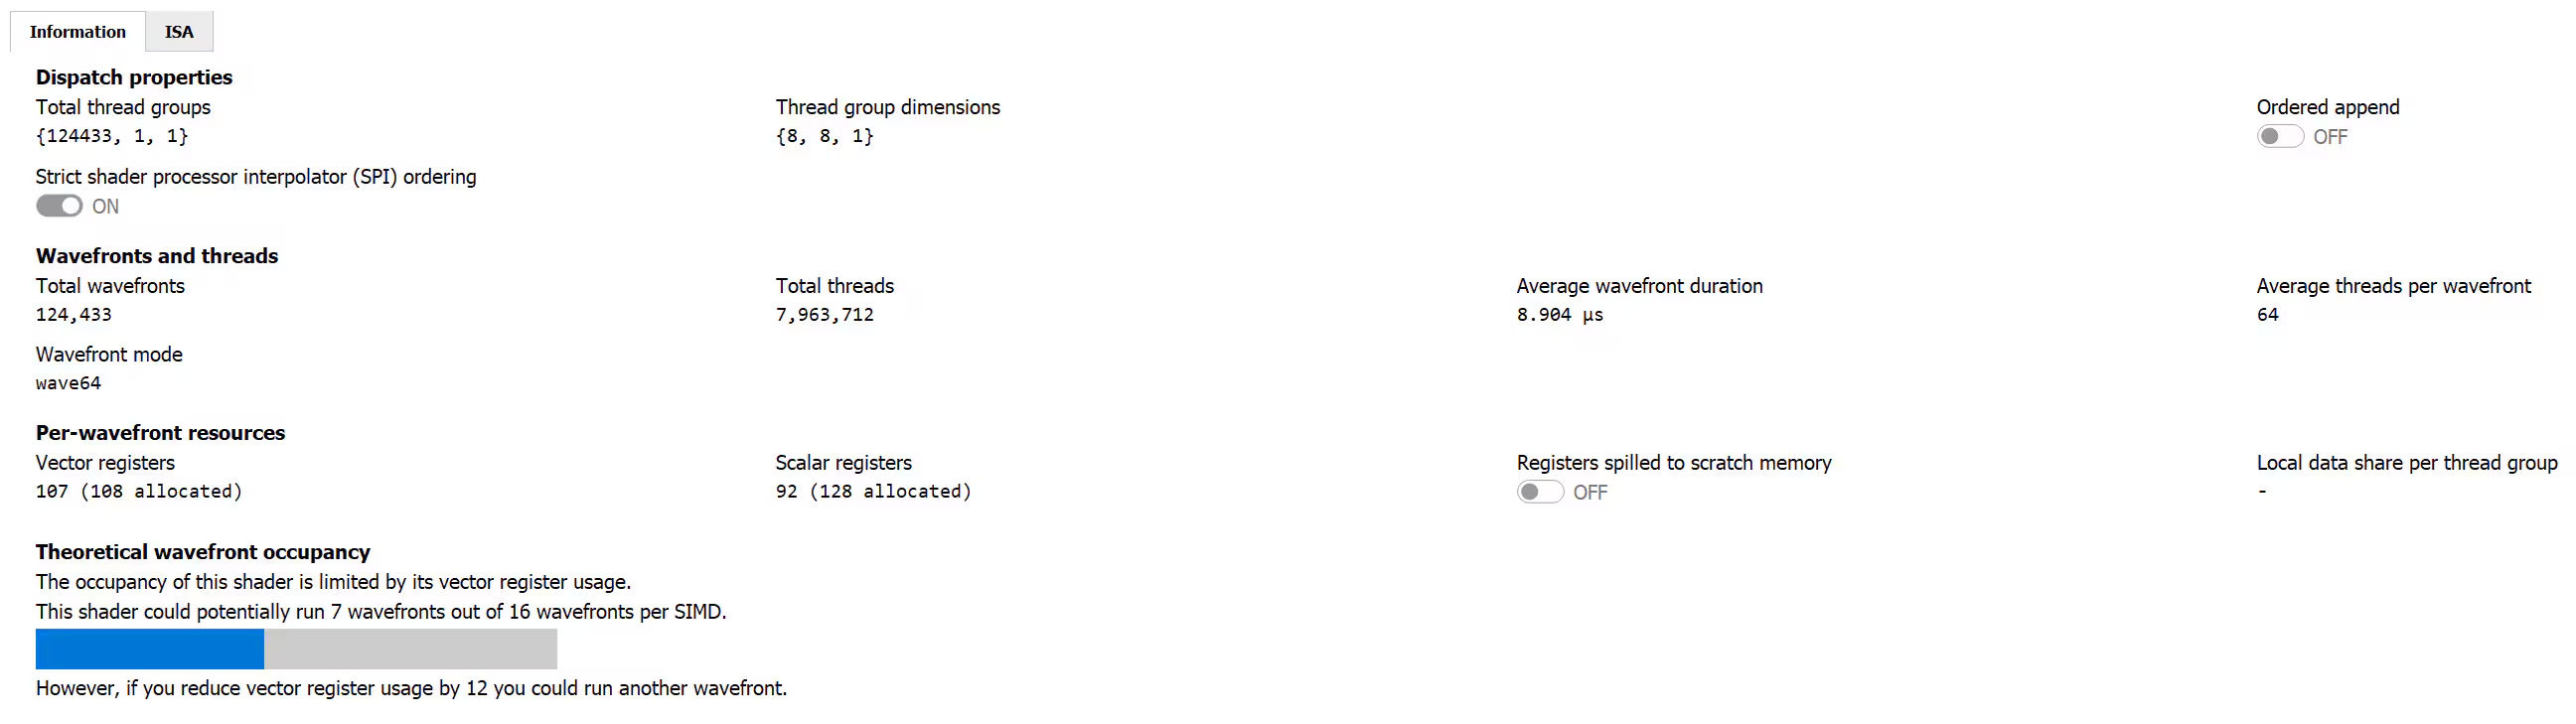
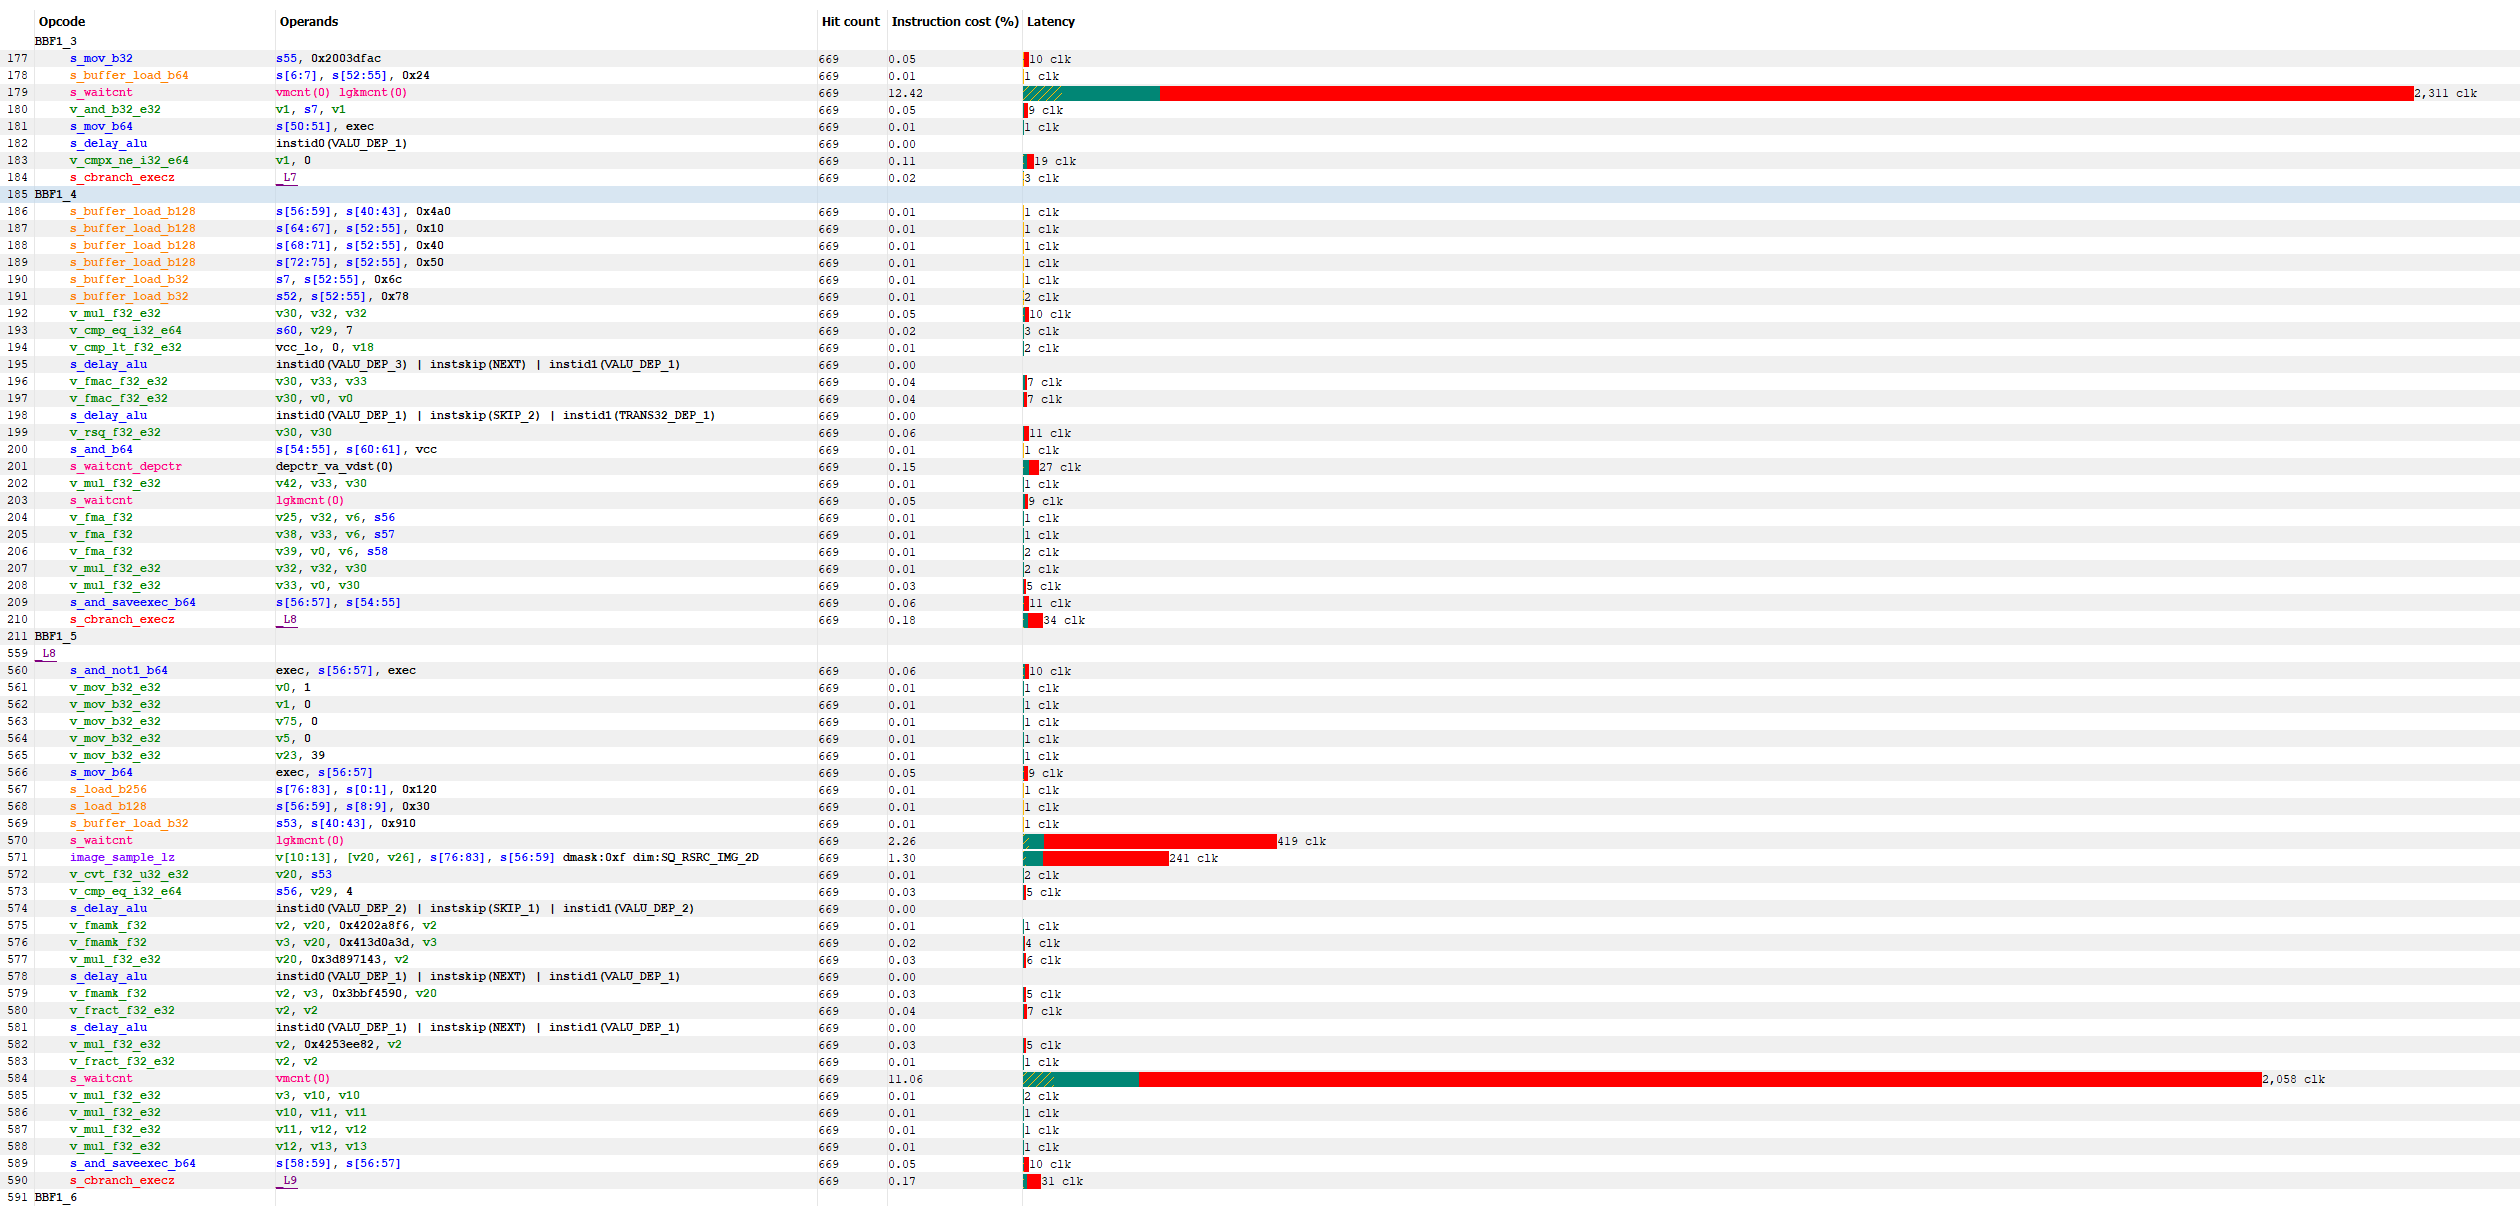
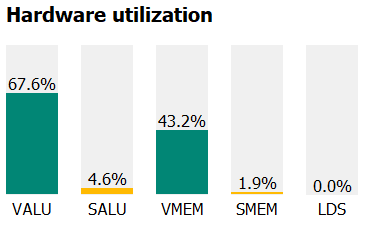
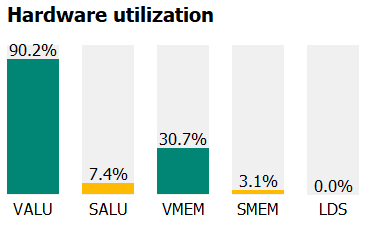
investigating by searching for We can see that the To inspect the details of the ExecuteIndirect command running on the GPU, right-click on the command and select View in Pipeline State. This view reveals that the ExecuteIndirect command translates to a compute Dispatch command. We can see the VGPR and SGPR usage information, as well as many useful wave and thread execution stats. The Pipeline state’s Information tab shows that our compute shader is only running at most 7 wavefronts due to its VGPR usage. On RDNA GPUs and above, this kind of GPU workload will execute in ‘partial waves’ which means the GPU is being underutilized. The Wavefront occupancy tab displays the We can further dig into the performance of this compute shader by selecting the Instruction Timing tab. This display provides the exact shader instructions that are executed on the GPU hardware and the percentage of clocks each instruction takes relative to the other instructions, which can be useful for identifying bottlenecks. The ISA view is also useful for other optimizations like scalarization, which are not covered here (see Intro to GPU Scalarization for more info on that subject). Next, we can enable our configuration change via the command console to see the performance impact: The After taking another performance capture with RDP and going back to the Event Timings view in RGP: The time taken for the dispatch is now 0.55ms - for a 30% performance uplift! The reason for this performance gain is due to increased occupancy from reduced VGPR requirements and reduced texture bandwidth requirements due to fewer reads of the screen probe texture, which leads to better hardware utilization, which we can see on the right most tab of the Instruction timing tab:
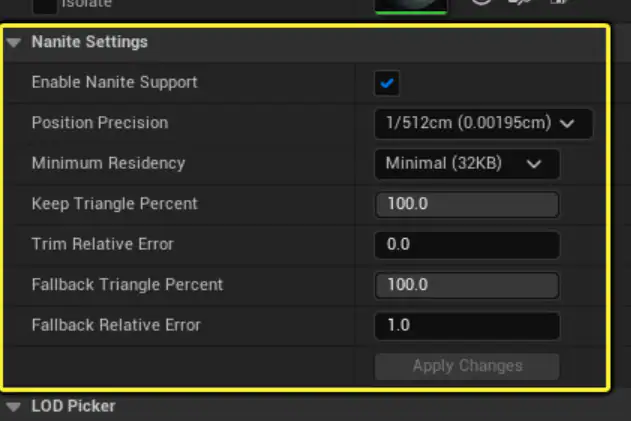
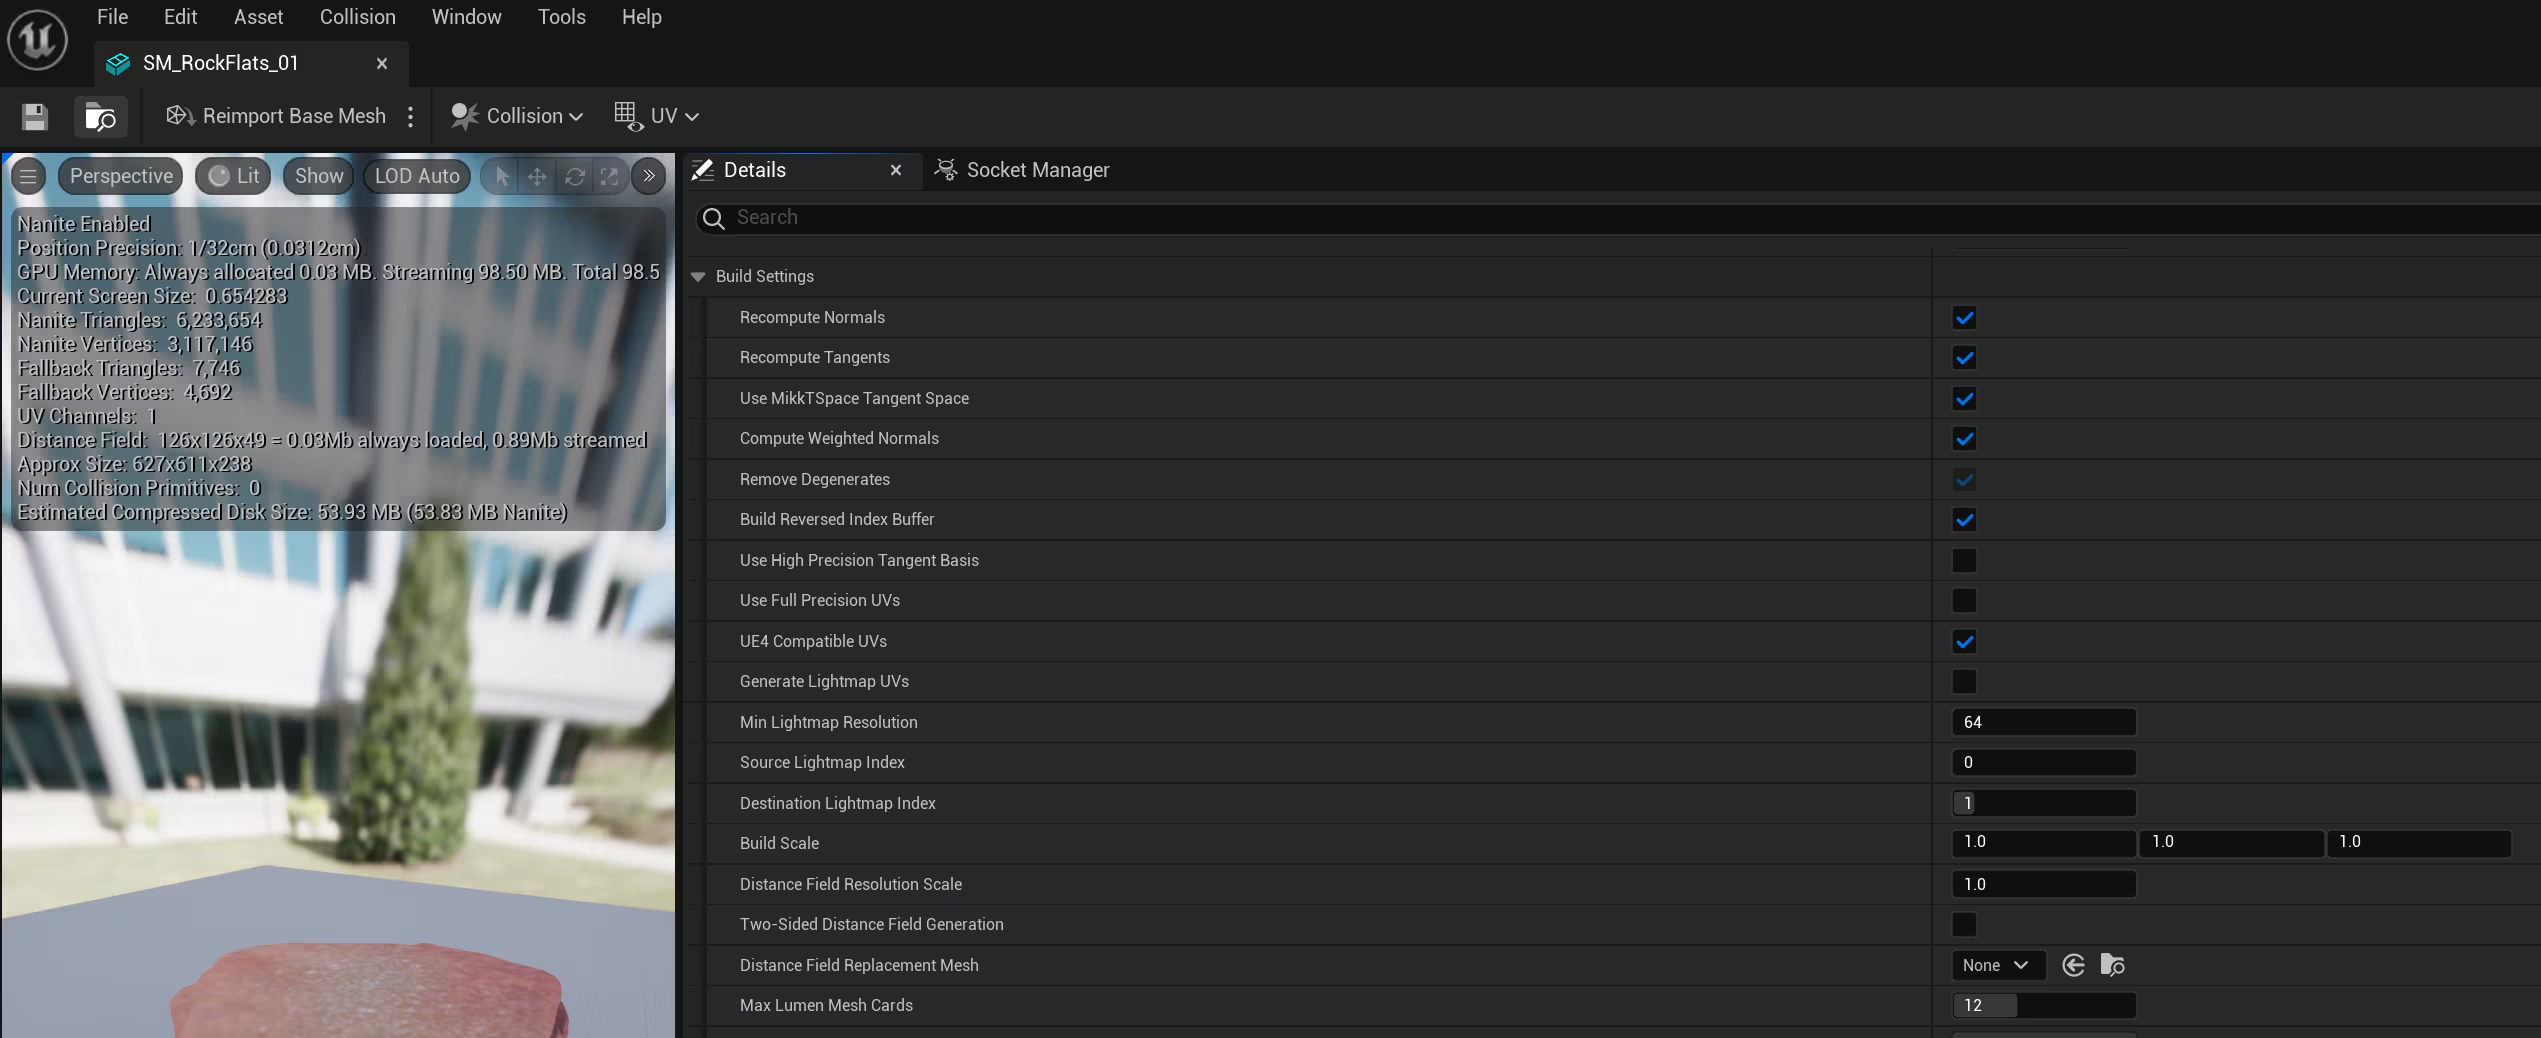
In addition, we can see on the Wavefront Occupancy and the Pipeline State tabs that our compute shader maintains its max possible occupancy of 12 wavefronts for most of its execution. Optimizing in Unreal EngineThis section presents general advice for the optimization of your content and shaders in UE. Of particular interest are the exciting and groundbreaking new features of Unreal Engine 5, including Nanite and Lumen, as well as Virtual Shadow Maps and several upscaling technologies available for UE5, including Temporal Super Resolution and FSR 3. AMD’s Dev Tech team has done extensive testing of these new features to understand how to get the best possible performance from them on AMD RDNA 3 GPUs. Optimizing NaniteNanite is Unreal Engine’s powerful new geometry engine which provides pixel scale detail and fine grained, fully automatic level of detail control. This is accomplished by implementing culling and rasterization of small primitives using compute shaders rather than the hardware’s fixed function capabilities. Testing of Nanite on AMD hardware shows that the two play quite nicely with each other. We recommend pushing your Nanite triangle density higher on RDNA 3 GPUs. When authoring Nanite assets you can control their density via the Position Precision and Keep Triangle Percent parameters. However, you must balance higher triangle density with the material
density. Lots of small Nanite triangles with very few materials is more
performant than lots of small Nanite triangles with many different
materials. The Nanite Visualization->Material ID and Nanite
Visualization->Material Complexity view modes provide a convenient way
to identify this type of performance problem in your project. To enable
the Nanite Material Complexity view mode you must set
Another factor to consider is the proportion of hardware rasterized
primitives versus software rasterized primitives. Nanite’s heuristic for
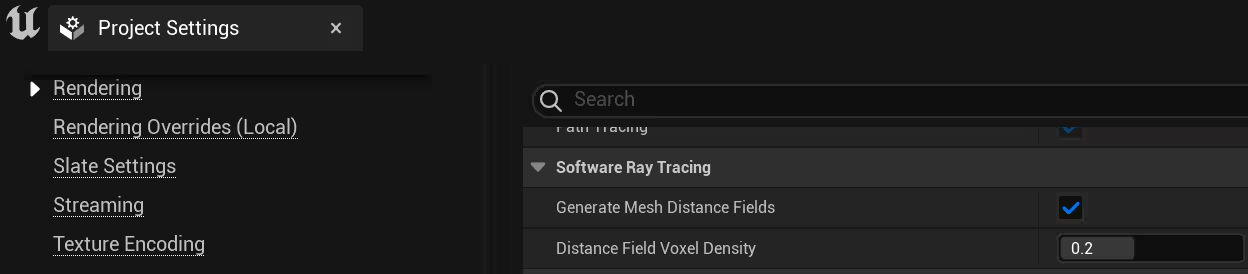
controlling this proportion is For more details on optimizing your Nanite content refer to the official documentation. Optimizing LumenUnreal Engine 5 also introduced a new global illumination and reflections system called Lumen. Lumen is extremely powerful and highly configurable. We’ve done a lot of work to identify optimal settings that balance visual fidelity with performance. First off, we would highly recommend using the software raytracing
option by setting Another useful configuration parameter to improve performance with
little to no perceptible quality loss is setting
Here are a few other Lumen cvar configuration parameters that you should test to see if you can gain some performance while minimizing visual quality loss.
Also, check out Epic’s Lumen Performance Guide for more optimization ideas. Optimizing Virtual Shadow MapsAlso introduced with Unreal Engine 5 is a new shadow mapping technique
called Virtual Shadow Maps (VSM). Realistic shadowing is one of the most
effective ways to achieve realism in your game, but it can also come
with a high performance cost. One hidden configuration gem for optimal
performance is Optimizing upscalingEmploying an upscaling solution for performance and anti-aliasing is essential if your game pushes UE’s capabilities to the limit. UE has multiple options for performing anti-aliasing and upscaling of the rendered frame. UE version 5 introduced the Temporal Super Resolution (TSR) algorithm. Version 4 of UE provided the TemporalAA Upscaling (TAAU) solution. And of course, AMD’s FSR plugins are also great options (if we do say so ourselves😊). UE5 Temporal Super ResolutionThe Temporal Super Resolution (TSR) feature of UE5 adds high quality super resolution upscaling, which can benefit your performance across the entire frame’s workload, but the TSR shader itself can be a huge time hog if not deployed carefully. Not only is the algorithm itself more complex, but motion vectors must be present and tracked across multiple frames to achieve high quality results. Also, be careful with setting the Anti-Aliasing quality to High or Epic because this might push your game out of the target frame rate. Combining TSR’s upscaling with setting The AA scalability settings can be updated in the file Lastly, it’s best to use TSR for upscaling and anti-aliasing, as opposed to just anti-aliasing. UE4 TAAU and FSR 3 are better options for anti-aliasing only solutions. UE4 TemporalAA upscalingIf TSR proves to be too expensive for your game, you can try the UE4
Temporal Anti-Aliasing Upscaler (TAAU) by setting the cvar
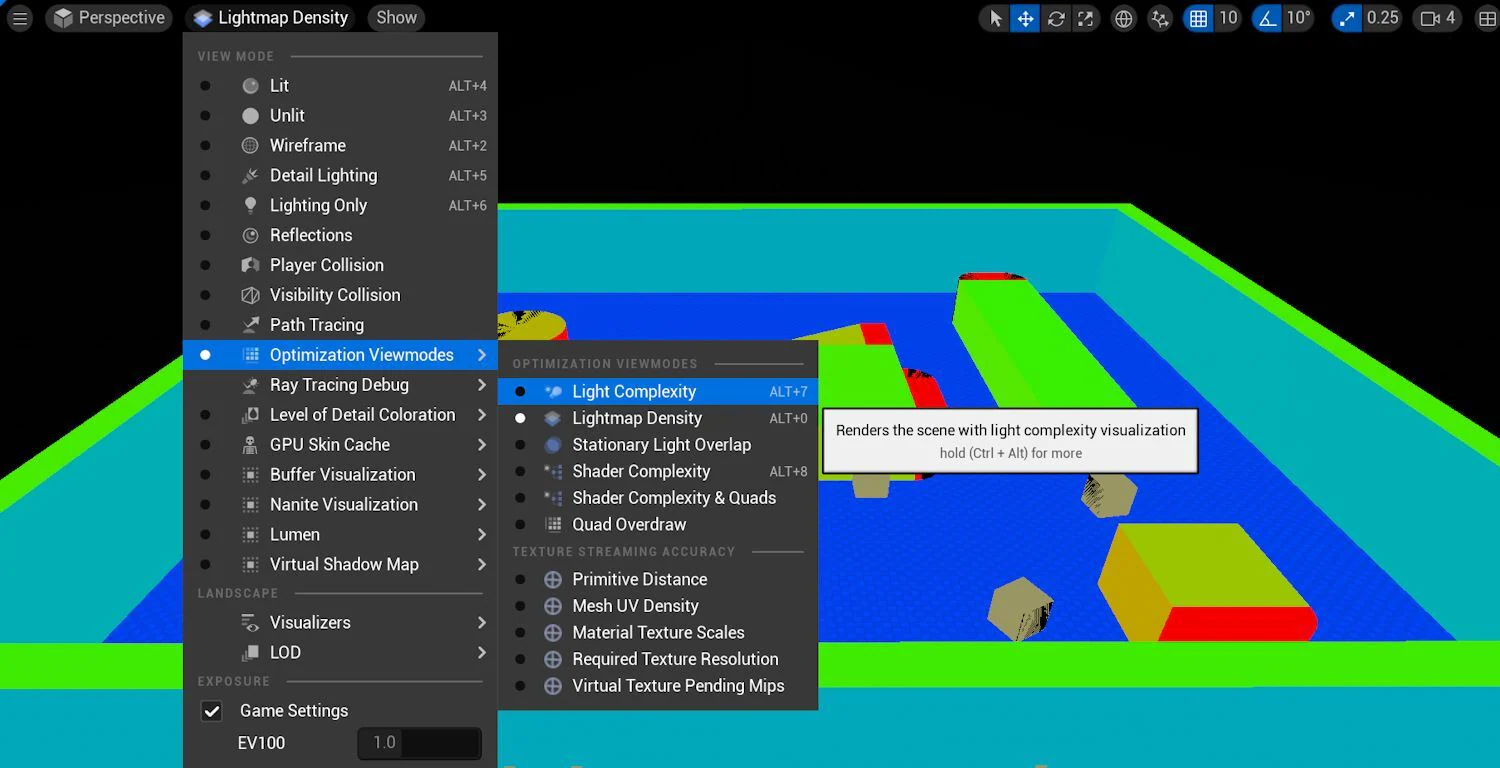
FSR 3AMD FidelityFX Super Resolution (FSR) 3 produces temporally anti-aliased and super resolution upscaled output that is comparable to that of TSR, but with better performance. FSR 3 goes above and beyond TSR and provides frame generation to boost the FPS and improve the perceived animation smoothness of your game. FSR 3 does this by adding two new technologies - Frame Interpolation and Optical Flow enhanced from AMD Fluid Motion Frames. Read more about the technical details of FSR 3 here: /fsr3-in-games-technical-details/. FSR 2The temporal anti-aliasing and upscaling tech for FSR 3 comes directly from FSR 2. If you are using UE4 or aren’t interested in the frame generation capacity of FSR 3 then FSR 2 temporal upscaling can fill your needs. Also, be sure to check out the details of FSR 2’s latest updates and our blog series on maximising your FSR 2 performance and quality. FSR 2 is available as a plugin for UE4 and U5. FSR 1FSR 1 is our spatial AA and upscaling solution. It is the lightest weight memory-wise and fastest of all the options presented, but still produces an extremely impressive upscaled result. FSR 1’s spatially based algorithm has the performance advantage over temporal because, unlike temporal anti-aliasing solutions, nearly the entirety of the post-processing operations can be rendered at the reduced resolution prior to upscaling by FSR 1. Furthermore, FSR 1 requires less input data, such as motion vectors, making it easier on your game’s memory footprint and easier to integrate. It’s definitely a great choice as an upscaling plugin if one of the temporal upscalers described above are too much for your game. For full details, check out the FSR 1 docs. Optimizing lighting and shadingThe UE editor has many visualization tools to aid with debugging. The most notable of these for debugging performance would be the Optimization Viewmodes. Some of the more useful ones are described below, refer to the official documentation for full details.
Optimizing your geometryNanite does not support all types of geometric meshes that you might want to use in your game, as such, good old fashion triangle meshes are still required. These mesh optimization techniques are important to keep in mind when working with non-Nanite meshes. First, avoid over-tessellating geometry. Use LODs to prevent pixel and sub-pixel size triangles because these small triangles perform very badly on AMD GPUs. Refer to the official documentation for details on LODs: https://docs.unrealengine.com/en-US/Engine/Content/Types/StaticMeshes/HowTo/LODs/index.html The Wireframe view mode, accessible through the editor, is a great first look at the geometric complexity of objects in your scene. Note that heavy translucency can slow down the Wireframe view mode and makes it look more crowded and less helpful. RenderDoc and PIX also show wireframe views. UE calculates scene visibility to cull objects that will not appear in the final image of the frame. However, if the post-culled scene still contains thousands of objects, then draw calls can become a performance issue. Even if we render meshes with low polygon count, if there are too many draw calls, it can become the primary performance bottleneck because of the CPU side cost associated with setting up each draw call for the GPU. Both UE and the GPU driver do work per draw call. The stat scenerendering command can be used to check the draw call count for your scene. However, reducing draw calls is a balancing act. If you decide to reduce draw calls by using few larger meshes instead of many small ones, you lose the culling granularity that you get from smaller models. We recommend using at least version 4.22 of Unreal Engine, to get the mesh drawing refactor with auto-instancing. See the GDC 2019 presentation from Epic for more details: Refactoring the Mesh Drawing Pipeline for Unreal Engine 4.22 | GDC 2019 | Unreal Engine Furthermore, UE’s Hierarchical Level of Detail (HLOD) system can replace several static meshes with a single mesh at a distance, to help reduce draw calls. See the official documentation for details: https://docs.unrealengine.com/en-US/Engine/HLOD/index.html. Optimizing CPU core usageWe can’t forget about the CPU. UE’s simulation and rendering tasks can
be a bit too greedy when it comes to CPU core usage. Unlimited usage of
CPU cores causes context switching or task stealing. Therefore, limiting
the cores by using Other useful profiling toolsThis section covers other built-in UE profiling tools for older versions of Unreal Engine. UE4 FrontEndThe console commands: UE4 GPU VisualizerThe ProfileGPU command allows you expand one frame’s GPU work in the GPU Visualizer, useful for cases that require detailed info from the engine. Some examples:
For the GUI version, set For more details, check out the official ProfileGPU documentation. We highly recommend using RGP in lieu of GPU Visualizer as your profiling workhorse for RDNA GPUs. RGP can have the same workflow as in the above examples. With RGP, you get in-depth GPU performance captures with more accurate timings and low-level ISA analysis. CSV Profiler and FPS ChartPrior to Unreal Insights the best tool for benchmarking over a long period of time was the CSV Profiler, getting stat unit times over the duration. Results get placed in a .csv file then the CsvToSvg Tool can convert this output to an interactive scalable vector graphic (SVG). Console commands to start/stop the CSV Profiler and/or FPS Chart:
Official documentation on these now deprecated tools: Further readingYou can find our FidelityFX Super Resolution Unreal Engine plugins at these links: Don’t miss our FSR 2-related patches to improve performance even further. Looking for even more ways to improve Unreal Engine performance? Or maybe you want to add new features such as our FidelityFX effects, or our Advanced Media Framework functionality? We also have a wide range of Unreal Engine patches for you to try. Related software AMD Radeon™ GPU Profiler AMD RGP gives you unprecedented, in-depth access to a GPU. Easily analyze graphics, async compute usage, event timing, pipeline stalls, barriers, bottlenecks, and other performance inefficiencies.  AMD Radeon™ Developer Panel The RDP provides a communication channel with the Radeon™ Adrenalin driver. It generates event timing data used by the Radeon™ GPU Profiler (RGP), and the memory usage data used by the Radeon™ Memory Visualizer (RMV).  AMD Schola AMD Schola is a library for developing reinforcement learning (RL) agents in Unreal Engine and training with your favorite python-based RL Frameworks.  AMD Radeon™ Anti-Lag 2 AMD Radeon™ Anti-Lag 2 reduces the system latency by applying frame alignment between the CPU and GPU jobs. Related news and technical articles AMD supports the latest DirectX 12 Agility SDKs, including new DXR features Microsoft DirectX® 12 Agility SDK 1.620 brings DirectX Dump Files, Extended PIX Markers and more to retail, and 1.722-preview adds new DXR features. See which AMD Radeon™ GPUs support each feature and which AMD driver you need.  New AMD Radeon Developer Tool Suite update brings shader source code, Extended PIX Markers, and command-line capture The new AMD Radeon Developer Tool Suite release delivers RGP 2.7 with shader source code viewing, instruction‑level divergence metrics, and Extended PIX Marker support, expanded hardware compatibility, and updates across RGD, RRA, RMV, RGA, and RDP.  How GOALS delivers sustained, competitive esports performance on handheld PCs - part 1 The first part of a developer-first look at how GOALS leverages AMD Ryzen APUs and the ADLX SDK to implement a system that reduces power, fan noise and carbon footprint across legacy and handheld hardware while preserving competitive performance.  AMD and Microsoft partner on DirectX ML, DirectStorage, and developer tools at GDC 2026 Microsoft and AMD partnered at GDC to announce powerful new developer technologies for Windows, including DirectStorage 1.4, PIX tools updates, DirectX ML integration, Advanced Shader Delivery, and support for the latest Agility SDK update.  Driving the future: frictionless automotive HMI development with Epic Games & AMD Ryzen AI Embedded P100 series At CES 2026 Epic Games and AMD unveiled the Unreal Engine 5 Next‑Gen HMI Experience powered by AMD Ryzen AI Embedded P100 Series, unifying instrument clusters, maps, and apps into a single high‑performance UE5 instance with gaming‑class graphics, and a streamlined developer workflow to deliver customizable, 60 FPS in‑cockpit experiences. 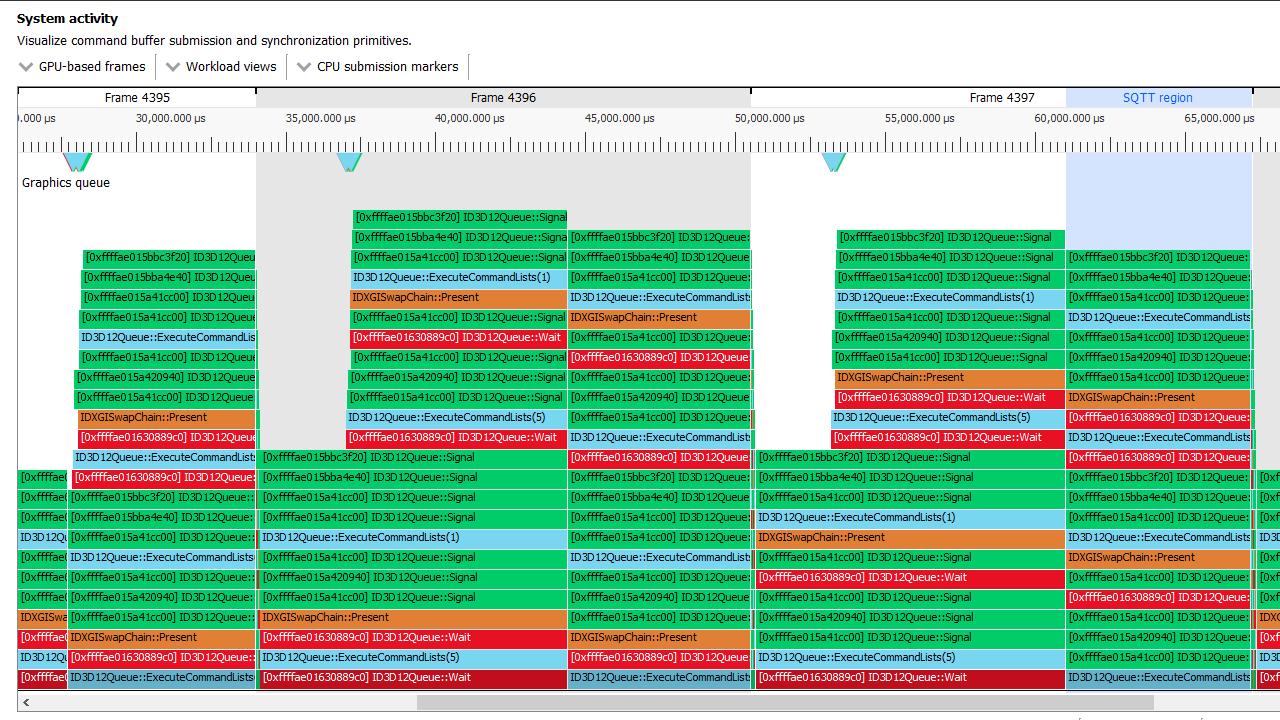 Understanding Graphs in Radeon GPU Profiler and GPUView Find out how to read and understand graphs in Radeon GPU Profiler and GPUView in order to optimize your game more effectively.  Understanding GPU context rolls Learn what a context roll on our GPUs is, how they apply to the pipeline and how they're managed, and what you can do to analyse them and find out if they're a limiting factor in the performance of your game or application.  AMD FSR plugin updated for Unreal Engine 5.8 The updated AMD FSR™ Unreal® Engine plugin brings ML-powered upscaling and frame generation to Unreal Engine 5.8, now extending FSR Upscaling support to AMD Radeon RX 7000 Series GPUs. Related videos Optimizing Game Performance with the Radeon Developer Tool Suite (GDC 2023 - YouTube link) This talk gives an overview of RGP, RMV, RRA, and RGA, introducing new features and improvements, and reveal the current work in progress.  Game Optimization: Radeon™ Developer Tools on RADV and Steam Deck™ (Vulkanised 2023 - YouTube link) This talk at Vulkanised 2023 covers how to use the Radeon Developer Tool Suite (RDTS) to optimize games using RADV and Steam Deck.  GDC 2024 - Game Optimization With The Radeon™ Developer Tool Suite - YouTube link This session presents the latest enhancements in the RDTS, a rich set of GPU profilers and analyzers and a new GPU crash analysis tool.  Introduction to raytracing with Radeon Developer Tool Suite In this video, Can Alper introduces RRA V1.0. He explains how to capture games using RDP and evaluate when to use RRA.  Raytracing Performance Revealed - How to Optimize your Game with the Radeon™ Developer Tool Suite - YouTube link In this presentation, we demonstrate how to use Radeon™ GPU Profiler and Radeon™ Raytracing Analyzer, to illuminate performance issues.  AMD RDNA™ 2 – Radeon™ GPU Profiler 1.10 - YouTube link RGP 1.9 and 1.10 introduce support for AMD Radeon™ RX6000 series GPUs, a new memory cache counter feature, and support for DirectX® and Vulkan® ray tracing.  AMD RDNA™ 2 – Radeon™ Developer Tool Suite - YouTube link This video describes the benefits of bundling the Radeon™ GPU Profiler, Radeon™ Memory Visualizer, Radeon™ GPU Analyzer, and the Radeon™ Developer Panel into a single downloadable suite.  Curing Amnesia and Other GPU Maladies With AMD Developer Tools - YouTube link This video introduces the new Radeon™ Memory Visualizer to help answer questions about memory allocations, resource bindings, page mappings, and more. Includes updates on RGP and RGA. | ||||||||||||||||||||||||||||||||||||||||||||||||||||||
| You are visitor 01402503 — GeezerVison does not store the pages you look up. Best viewed with Netscape Navigator 4.7 or Internet Explorer 6 at 800×600. No cookies required. |