GeezerVisonThe World Wide Web, restored to 800 pixels of glory. |
| Home|About|Gaming cabinet|Archives|How it works|Starter sites |
GeezerVison is showing happycoding.io — Bootstrap BootstrapBootstrap
Now you know how to use HTML to create a webpage, how to style it with CSS, and how to make them interactive using JavaScript. You’ve also learned about JavaScript libraries, which let you use code written by other people. This tutorial introduces Bootstrap, which is a JavaScript library and a set of CSS styles you can use in your own webpages. BootstrapBootstrap is really two things:
To use Bootstrap, load both the Bootstrap CSS and the Bootstrap JavaScript library: Now that you’ve loaded the CSS and the JavaScript, you can use both in your page. Let’s talk about them one at a time: Bootstrap CSSBy now you know that you can style your webpage using CSS. You create a Bootstrap provides a For example, look at this page that contains unstyled content:
Code Editor
?
See the Pen by Happy Coding (@KevinWorkman) on CodePen. I’ve set the
Code Editor
?
See the Pen by Happy Coding (@KevinWorkman) on CodePen. The only thing that changed is I’ve added the Bootstrap CSS file (and the Bootstrap JavaScript, which doesn’t do anything yet). In that CSS, Bootstrap contains styles for the classes I used. The payoff is I get a reasonably nice-looking webpage, without needing to write any CSS myself. Bootstrap JavaScriptThe other half of Bootstrap is its JavaScript library, which contains objects and functions that let you create interactive elements. This is usually done automatically based on the Let’s start with the HTML, without loading Bootstrap:
Code Editor
?
See the Pen by Happy Coding (@KevinWorkman) on CodePen. This HTML contains a But if you add Bootstrap:
Code Editor
?
See the Pen by Happy Coding (@KevinWorkman) on CodePen. The HTML itself has not changed, but now the code loads Bootstrap’s CSS and JavaScript. Bootstrap’s CSS styles the elements to look like a dropdown, and Bootstrap’s JavaScript automatically adds a click listener to the The power of Bootstrap is that you didn’t have to write any of that CSS or JavaScript yourself. You get the functionality and a reasonable look-and-feel by including the Bootstrap CSS and JavaScript and using the corresponding classes on your HTML elements. Bootstrap ComponentsNow that you know Bootstrap is both CSS and JavaScript that responds to certain CSS classes, the next question is: how do you know what CSS classes to use to trigger the correct behavior? If you’ve been reading the rest of these tutorials, you can probably guess by now that the answer is: consult the documentation! The Bootstrap documentation contains a bunch of example components (like the dropdown from above) that you can use. If you’re interested in using Bootstrap, this page should be your first stop. I recommend reading through that whole thing at least once, and then going back to it later when you need a specific component. W3Schools also has a good section of Bootstrap examples. And of course search engines are always your best friend. Here are a couple examples of the most common Bootstrap components: ContainerThe Here’s an example:
Code Editor
?
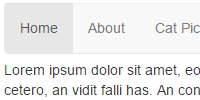
See the Pen by Happy Coding (@KevinWorkman) on CodePen. Try opening this code up in its own window and then changing the width of the window to see the container “snap” to different widths. This lets you create a responsive webpage without worrying about any styling yourself. NavigationTo create a navigation bar, you can use a
Code Editor
?
See the Pen by Happy Coding (@KevinWorkman) on CodePen. (The navigation bar is automatically turned into a vertical menu if it doesn’t have enough width, so try opening this in a new window.) From here you can do fancier things like putting different types of components inside your nav, or changing how your navigation works on mobile devices. Check out Bootstrap’s documentation for more info! GridBootstrap contains a grid layout system that lets you organize your content using the By default, each row takes up 100% of the container width, and then each column in a row takes up an equal share of the row’s width. Here’s an example with four rows, each with a different number of columns.
Code Editor
?
See the Pen by Happy Coding (@KevinWorkman) on CodePen. Within each row, each column takes up an equal share of the available width. Bootstrap divides each row into 12 “template columns”, and by default, the
Code Editor
?
See the Pen by Happy Coding (@KevinWorkman) on CodePen. Now each row has columns that take up different amounts of template columns. Here are a couple things to notice:
You can use Bootstrap’s grid layout to organize your page into sections. Here’s an example:
Code Editor
?
See the Pen by Happy Coding (@KevinWorkman) on CodePen. This page splits the page up into three columns: one for the left nav, one for the main content, and another for the right nav. Check out Bootstrap’s grid documentation for other examples, including using different layouts on different screen sizes. Custom StylingAs you’ve seen, Bootstrap provides its own CSS styles. But you aren’t stuck with the default styles that Bootstrap provides. You can add your own CSS rules for any Bootstrap class to create your own custom style. Keep in mind the cascading part of CSS, which means that your styles will be combined with the styles from the main Bootstrap CSS.
Code Editor
?
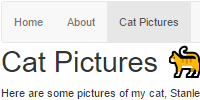
See the Pen by Happy Coding (@KevinWorkman) on CodePen. This example uses Bootstrap for most of the styling, but adds some custom styling in its own This gives you the best of both worlds: you get to use all of the styles from Bootstrap, but you still get to customize your site with whatever styles you want. ThemesAnother feature of Bootstrap is the availability of themes, which are alternative CSS files that style Bootstrap’s classes. To use a theme, instead of loading Bootstrap’s default Here’s an example page that uses Bootstrap’s default styles, aka the default theme:
Code Editor
?
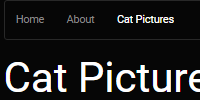
See the Pen by Happy Coding (@KevinWorkman) on CodePen. And here is that same page using the Cyborg Theme from Bootswatch:
Code Editor
?
See the Pen by Happy Coding (@KevinWorkman) on CodePen. Notice that the only thing that really changed is the Try doing a search in that file for the Bootstrap Pros and ConsI originally wrote this tutorial back in January of 2017. Back then, I was personally using Bootstrap to style Happy Coding. But since then, I’ve grown to prefer writing my own CSS. A little CSS goes a long way (warning: that page contains swears), without needing to rely on Bootstrap! Even though I don’t really use Bootstrap myself anymore, I’ve decided to keep this tutorial up (and to continue teaching Bootstrap) for a couple reasons: First, it’s still really popular. You’re pretty much guaranteed to encounter Bootstrap as you’re learning how to create webpages, so I wanted to introduce it along with the other concepts you’ve been learning about. My hope is that I helped demystify bootstrap. It’s not magic! At the end of the day, it’s the same HTML, CSS, and JavaScript that you’ve already been using. Second, and most importantly, I wanted to introduce the concept of using a frontend framework. There are a ton of frameworks out there, and Bootstrap is just one of them. So more important than using Bootstrap specifically, I wanted to show you the more general process of using a framework, consulting documentation, and trying things out. If you continue learning more about web development, you’ll almost certainly encounter other frameworks along the way, and hopefully being exposed to Bootstrap will make them a little easier to understand. All of that said, you shouldn’t feel like you need to use Bootstrap to create a webpage! Homework
Bootstrap Examples |
| You are visitor 01402503 — GeezerVison does not store the pages you look up. Best viewed with Netscape Navigator 4.7 or Internet Explorer 6 at 800×600. No cookies required. |